Image capture
MuseScore's image capture feature allows you to save a snapshot of any part of the score window. PNG, PDF and SVG formats are supported.
Save a snapshot
- Click on the Toggle image capture button,
 .
. - Press Shift + drag, to create a new selection rectangle.
- Fine tune the rectangle position, if required, by dragging it and/or changing the "Position" values in the "Image Capture" section of the Inspector.
- Fine tune the rectangle area, if required, by dragging the handles, and/or changing the "Size" values in the Inspector.
- Right-click on the selection rectangle to open the Image Capture menu. Select the desired option:
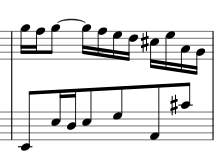
- Save As (Print Mode). This saves an image of the selection area as it would look if printed, e.g.

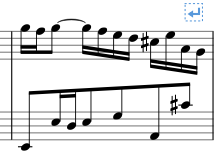
- Save as (Screenshot Mode). This saves a selection of the actual screen, including any line break symbols, invisible elements etc., e.g.

- Save As (Print Mode). This saves an image of the selection area as it would look if printed, e.g.
You can save the image in either PNG (default), SVG or PDF format.
Note: SVG is a vector graphics format rather than being pixel-based (or raster, like BMP or PNG). The advantage of this format is that enlarging the image or zooming in does not cause blurring or unwanted sawtooth effects.
Image capture menu
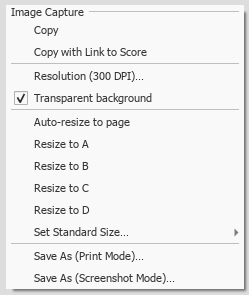
Right-clicking on the selection rectangle opens the Image Capture menu (Mac: Ctrl + click, or 2-finger-tap):

- Copy: Choose this to copy an image before pasting it in the same or another MuseScore file.
- Copy with Link to Score: Choose this to copy an image including a link to the MuseScore file. When pasting this into a program that supports this, you can click on the image to open the MuseScore file.
- Resolution: Set the resolution, and hence the size of the saved or copied image. Try 100 dpi to start with, if you are unsure.
- Transparent background: Turn image transparency on or off.
- Auto re-size to page: Adjusts the selection rectangle to fit the page.
- Resize to A/B/C/D: Choose a customized selection rectangle (as set below).
- Set Standard Size: Resize the selection rectangle, then choose "Set size A/B/C/D" to store it.
See also
External links
- Create an ossia with image capture (MuseScore HowTo)
- How to create an ossia with another staff (MuseScore HowTo)