Plugins
Overview
Plugins are small pieces of code that add a particular feature to MuseScore. By enabling a plugin, a new menu option will be appended to the Plugins menu in MuseScore to accomplish a given action on the score or a part of it.
Some plugins come pre-installed with MuseScore—see →below. You can find many more plugins in the plugin repository. Some plugins there work with MuseScore 2; others will only work with older versions of MuseScore, some work with either.
To tell one from the other: for MuseScore 2.x the plugin code files have an extension of .qml, for older versions, it is .js.
Installation
Note that some plugins may require the installation of other components (fonts, e.g.) to work. Check the plugin's documentation for more information.
Most plugins are provided as ZIP archives, so download the plugin's .zip file and uncompress it to one of the directories mentioned below. If a plugin is provided directly as an (unzipped) .qml file, simply download and place into one of these directories.
Once a plugin is installed, it needs to be enabled in the Plugin Manager in order to use it—see →below.
Windows
MuseScore looks for pre-installed plugins in %ProgramFiles%\MuseScore 2\Plugins (or %ProgramFiles(x86)%\MuseScore 2\Plugins for the 64-bit versions) and in %LOCALAPPDATA%\MuseScore\MuseScore 2\plugins on Vista, Seven and 10 or C:\Documents and Settings\USERNAME\Local Settings\Application Data\MuseScore\MuseScore 2\plugins (adjusted to your language version) on XP.
To install new plugins, the above folders should not be used or modified. Instead you can add other plugins to %HOMEPATH%\Documents\MuseScore2\Plugins, or specify a different folder to look for plugins in MuseScore's Preferences.
macOS
On macOS, MuseScore looks for pre-installed plugins in the MuseScore bundle in /Applications/MuseScore 2.app/Contents/Resources/plugins (to reveal files in the app bundle, right click on MuseScore 2.app and choose "Show package contents") and in ~/Library/Application Support/MuseScore/MuseScore 2/plugins.
To install new plugins, the above folders should not be used or modified. Instead you can add other plugins to ~/Documents/MuseScore2/Plugins, or specify a different folder to look for plugins in MuseScore's Preferences.
Linux
In Linux, MuseScore looks for plugins in /usr/share/mscore-2.0/plugins and in ~/.local/share/data/MuseScore/MuseScore 2/plugins.
To install new plugins, the above folders should not be used or modified. Instead you can add other plugins to ~/Documents/MuseScore2/Plugins, or specify a different folder to look for plugins in MuseScore's Preferences.
Enable/disable plugins
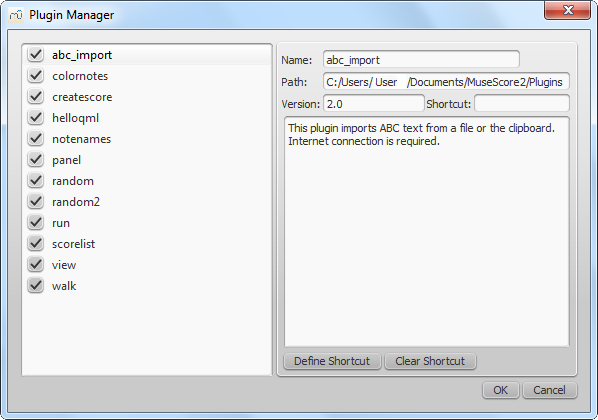
To be able to access the installed plugins from the Plugins menu, they need to be enabled in the Plugin Manager:

Create/edit/run plugins
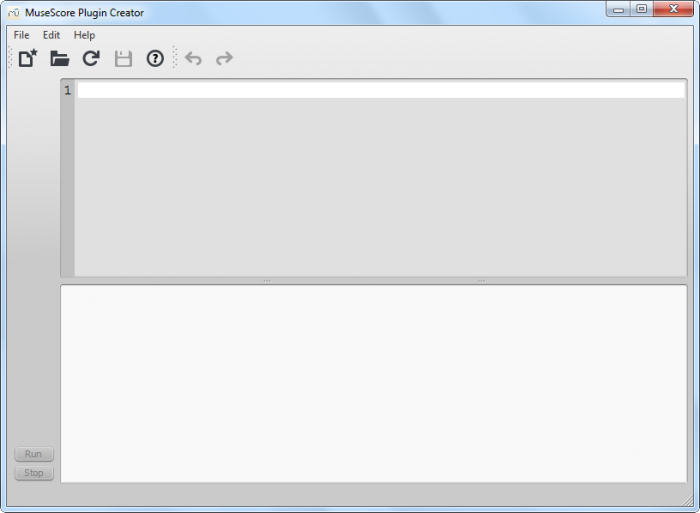
It is possible to create new or edit existing plugins and run them via the Plugin Creator:

Here also the documentation of all available elements can be found
Plugins installed by default
Some plugins come pre-installed with MuseScore, but they are not enabled by default. See →above to enable plugins.
ABC Import
This plugin imports ABC text from a file or the clipboard. Internet connection is required, because it uses an external web-service for the conversion, which uses abc2xml and gets send the ABC data, returns MusicXML and imports that into MuseScore.
Break Every X Measures
This plugin enters line breaks in the interval you select on the selected measures or, if no measures are selected, the entire score. It is no longer being distributed and has been replaced by Edit → Tools → Add/Remove Line Breaks. If you ever used an early beta version of MuseScore 2, though, you may still see the plugin left over.
Notes → Color Notes
This demo plugin colors notes in the selected range (or the entire score), depending on their pitch. It colors the note head of all notes in all staves and voices according to the Boomwhackers convention. Each pitch has a different color. C and C♯ have a different color. C♯ and D♭ have the same color.
To color all the notes in black, just run that plugin again (on the same selection). You could also use the 'Remove Notes Color' plugin for this.
Create Score
This demo plugin creates a new score. It creates a new piano score with 4 quarters C D E F. It's a good start to learn how to make a new score and add notes from a plugin.
helloQml
This demo plugin shows some basic tasks.
Notes → Note Names
This plugin names notes in the selected range or the entire score. It displays the names of the notes (as a staff text) as per MuseScore's language settings, for voices 1 and 3 above the staff, for voices 2 and 4 below the staff, and for chords in a comma separated list, starting with the top note.
Panel
This demo plugin creates a GUI panel.
random
Creates a random score.
random2
Creates a random score too
run
This demo plugin runs an external command. Probably this will only work on Linux.
scorelist
This test plugin iterates through the score list.
ScoreView
Demo plugin to demonstrate the use of a ScoreView
Walk
This test plugin walks through all elements in a score