浏览和导航
无障碍支持
屏幕阅读器
Musescore 4 分别在以下操作系统中支持这些屏幕阅读器:
- Windows 10 和 11: 讲述人 和 NVDA
- macOS: 旁白
- Linux: Orca
大部分时候,基于JAWS的屏幕阅读器能够工作,但是朗读的结果不像使用旁白或NVDA那样完整。
在Windows系统中使用屏幕阅读器
如果屏幕阅读器的语音输出突然停止工作,您可以尝试按Alt+F来选中文件菜单,然后按Esc两次以返回你原来在应用程序中的位置,此时,屏幕阅读器理应能够正常工作。如果你想要先运行 Musescore,再启动屏幕阅读器,您就必须这么做。
在Mac系统中使用屏幕阅读器
在使用 Musescore 4 时,“旁白”的旁白快速导览必须被关闭。您可以通过在“旁白”运行时同时按下左和右箭头键来打开或关闭快速导览,或者你可以从“旁白实用工具>管理”关闭旁白快速导览。
MuseScore 的界面既可以用 Tab 跳转,又可以用“旁白”自己的光标跳转。一般来说,最好使用 Tab,因为这既与其他平台上的界面相匹配,又是大多数文档和教程中讲述的内容。“旁白”的光标可以用来到达应用程序中不能通过 Tab 光标访问的区域。当使用 Tab 时,记得配合使用方向键(参见在用户界面中跳转)。
在Linux系统中使用屏幕阅读器
在 Linux 上,在启动 MuseScore 之前必须启动屏幕阅读器,否则辅助功能将被禁用以节省系统资源。如果您忘记这样做,只需退出 MuseScore 并再次启动它。所有构建在 Qt 框架上的 Linux 应用程序也是如此。
Orca 是 Linux 上功能最齐全的屏幕阅读器。Orca 内置于 GNOME 桌面环境中,因此建议有无障碍需求的 Linux 用户使用基于 GNOME 或其衍生产品的发行版。
键盘控制
在用户界面中跳转
MuseScore 4 用户界面(UI)中的键盘跳转既依赖于 Tab 键又依赖于方向键。您可以使用 Tab 键循环遍历每个控件组,然后使用方向键跳转到组内的各个控件。在其他应用程序(包括以前版本的 MuseScore)中通常是用 Tab 键访问每个单独的控件。但是 Musescore 4 的全新的跳转系统允许你用更少的按键跳转到界面中的任何地方。新的跳转系统仍在改进中,欢迎在开发论坛提出反馈意见。
除了方向键和 Tab 键,您可以使用F6键在程序中的不同面板之间切换。下面是如何使用各个快捷键来跳转的方法:
-
上、下、左、右箭头:将光标从控件组中的一个控件移动到下一个控件(例如在工具栏中的按钮之间切换)。
-
Tab和Shift+Tab:将光标从一个控件组移到下一个控件组(例如在工具栏之间切换)。
-
F6和Shift+F6:在面板和其他大块的UI之间移动光标(例如从工具栏切换到符号面板或乐谱中)。
默认情况下,重音符`(有时被称为反撇号)可以用来代替F6来在面板和其他大块的UI之间移动光标。在大部分QWERTY的键盘上,重音符在Tab的上方。如果你的键盘上那个键不是重音符,你可以考虑在偏好设置里把快捷键修改到那个在Tab上方的按键,因为这个位置使得所有的跳转快捷键被排在一起方便使用。
一旦你的光标已经移动到某个控件,在大多数情况下,你可以通过按Spacebar、Enter或Return键进行操作。在列表或其他某些杂项中,空格键通常用于选择项目而不是激活它们。某些项目一旦被选中就会被激活,于是就可以通过按Delete键删除,或可以通过按Tab键移动到其他UI控件来修改。例如,您可以在乐器面板中使用此方法删除之前添加到乐谱中的乐器。
在乐谱中跳转
在乐谱中(即在记谱视图中)跳转的方式与 MuseScore 3 基本相同。以下快捷方式可能对无障碍用户特别有用:
| 快捷键 | 操作 |
|---|---|
| Alt+右和Alt+左 | 移动到下一个或上一个元素。这些快捷键使您能够访问各种符号元素,而不仅仅是音符和休止符。 |
| Alt+上和Alt+下 | 移动到上面或下面的音符。这些快捷键使您可以在和弦中的单个音符之间移动,也可以移动到其他声部和五线谱的音符和休止符中。 |
| F2或Alt+Shift+E | 编辑所选元素。这相当于用鼠标双击一个元素。它使您能够编辑文本对象,包括歌词、力度和节奏标记。它还允许您调整线元素的长度,如渐强渐弱记号,连奏线和跳跃号(使用Tab键在左端和右端之间切换)。完成编辑后,您需要按下Esc键以回到正常模式。 |
键盘导航的其他操作在这本手册的各个页面上都有描述。
视频教程
下面的无障碍教程旨在让您使用键盘和屏幕阅读器启动和运行MuseScore。它们并没有涵盖程序的每一个方面,但它们应该会为你充分理解和运用本手册的其余部分打下一个坚实的基础。
| 视频 | 描述 |
|---|---|
| 安装 MuseScore | 本视频介绍了 MuseScore 在 Windows 上的安装过程,包括 Muse Hub 和 Muse Sounds。这个过程在 macOS 和 Linux 上是相似的,尽管在 Linux 上你需要分别安装 Muse Hub 和 MuseScore。 |
| 初始化乐谱 | 本视频介绍了乐谱的初始设置,包括选择乐器和选择键和拍号以及其他设置。 |
| 输入音符 | 此视频介绍了基本的音符输入。 |
| 添加标记 | 此视频介绍如何使用符号面板向乐谱添加力度变化等标记。 |
| 用户界面 | 此视频将介绍程序的各个窗口,您可以从中了解所有不同面板、工具栏和控件的位置,以及如何通过键盘访问它们的方式。 |
用户界面
菜单栏

在 MuseScore 4 中,菜单栏 包含以下菜单:
- 文件: 创建新文件、打开和保存文件、导入和导出各种格式、创建和编辑乐器部分以及打印
- 编辑: 撤消和重做选项、复制/剪切/粘贴选项以及查找/转至功能
- 视图: 显示或隐藏各种调色板、对话框和其他工作区元素。在显示子菜单下的项目调整非打印元素的显示:
- 显示不可见: 根据它们的 属性面板: 不可见 设置显示/隐藏元素。如果选中此选项,不可见元素将在谱面窗口中以浅灰色显示。
- 显示格式: 显示/隐藏 系统和水平间距: 系统分段 或 页和垂直间距: 页分段 符号。
- 显示框架: 显示/隐藏 框架 的虚线轮廓。
- 显示页边距: 显示/隐藏 谱的尺寸和间距: 页边距。
- 显示不规则小节: 小节右上角的加号或减号表示其持续时间与拍号设置的持续时间不同。

- 添加: 添加不同种类的乐谱元素,例如音符、文本、线性记号等。
- 格式: 调整全局或部分乐谱的格式。也可以拉伸或收缩乐谱、加载或保存乐谱样式,等等。
- 工具: 这里提供许多有用的命令,包括移调、交换声部、用斜杠填充小节等。
- 插件: 管理您的插件
- 帮助: 访问在线手册、报告错误和提供反馈,并恢复出厂设置
在 Windows 和 Linux 上使用键盘的用户可以通过按住 Alt 键并按下特定的字母或数字键(称为 助记访问键 ),该键在您寻找的菜单项名称中显示有下划线来访问这些菜单。例如,按 Alt+F 来访问 文件,然后按 Alt+A 来访问 另存为。在 UI 中,字母 'F' 和 'a' 在按住 Alt 键时会被下划线标出。
在 macOS 上,MuseScore 的菜单是系统范围内的菜单栏的一部分,您可以通过按 Ctrl+F2 导航到该菜单。
主页选项卡

在主菜单下方有三个选项卡,第一个是 主页 选项卡。该选项卡包含以下部分:
我的账户
创建一个新的 MuseScore 账户,或登录到您现有的账户。有了活跃账户,您可以在 musescore.org 的论坛上获得技术支持并报告错误。您也可以将您的文件保存到 musescore.com 上的云端。
乐谱
该部分允许您设置新乐谱,或打开现有乐谱。了解有关创建新乐谱的信息,请参阅 设置您的乐谱。
插件
此窗口显示可用插件的列表。查看有关管理这些有用附加组件的章节 插件。
学习
这是视频教程的主页。单击任何视频教程都会在 官方 MuseScore YouTube 频道 上打开它。
乐谱选项卡

在 MuseScore 中,这个区域是您进行大部分工作的地方,包括添加音乐符号和听取谱表的播放。工作区由几个区域组成(根据下图中的标签编号):
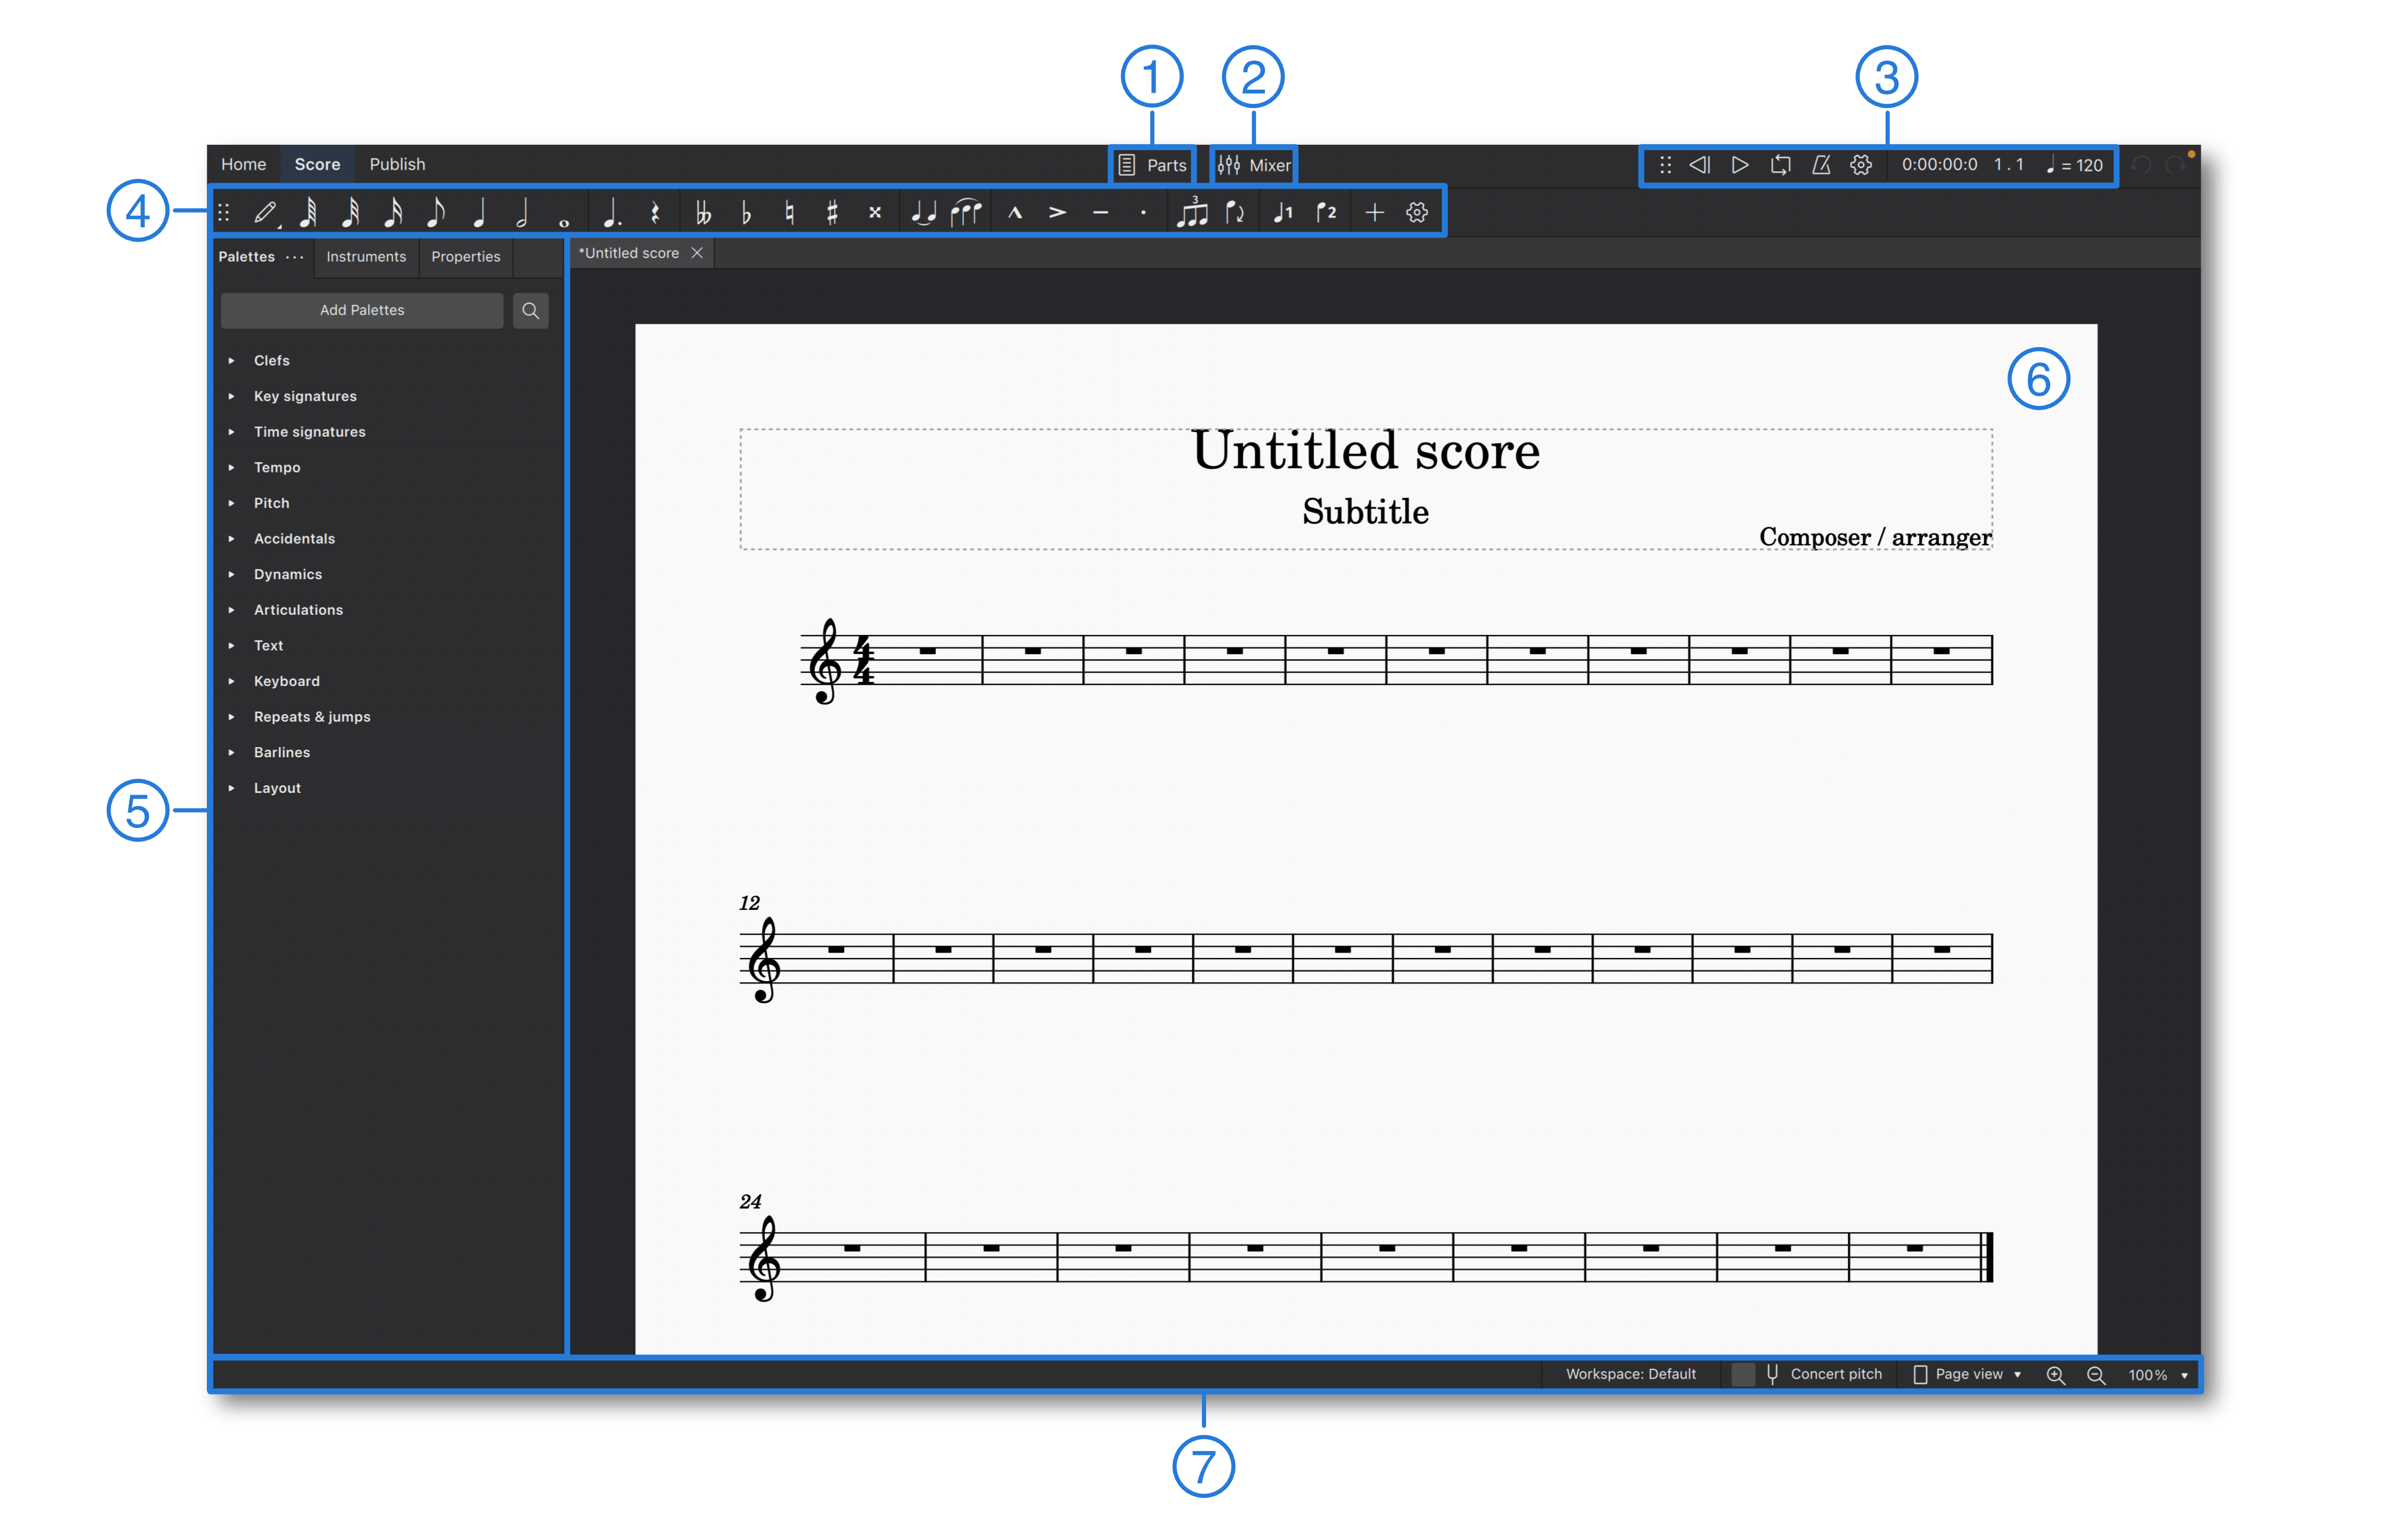
- 分谱:位于窗口顶部中心附近,在那里,您可以创建、编辑和删除分谱。
- 混音器:位于 分谱 按键的右边,可以打开 混音器 面板。
- 播放面板:位于混音器图标的右侧。
- 音符输入面板:位于整个屏幕的上部,在这里您可以找到乐谱中的基本符号。也可以在这里设置音符的时值,切换临时记号,使用常见演奏记号,输入三连音,或者切换声部。
- 侧边栏:位于窗口的左侧。您可以在这里找到符号面板、属性以及乐器。可以根据需要被隐藏或显示。
- 乐谱:程序的主要窗口,包含了您的乐谱。您可以在这里添加、编辑或删除符号元素。
- 状态栏:位于窗口的最底部。当选择一个或多个元素时,它的左侧会显示有关乐谱的相关信息。您可以在它的右侧更换工作区,选择是否使用标准音高,并指定页面显示和缩放倍率。
键盘用户可以使用Tab或F6键来在不同区域之间切换。您可以在每个区域内使用方向键和Tab键切换到不同的元素。
Musescore 4 中几乎所有的面板和工具栏都可以根据您的需求和工作区偏好设置隐藏或修改位置。了解更多信息,请参阅 工作区。
发布选项卡

此选项卡允许您查看不带音符输入工具栏或侧边栏面板的谱表。有打印谱表的选项,以及将其导出为各种图像、音频和文档格式的选项。当您完成谱表时,还可以将其发布到 musescore.com。
上下文菜单
在应用程序的某些部分,主要是在 乐谱选项卡,提供了具有额外功能的上下文菜单,例如复制、编辑、自定义、删除或查看在您打开菜单时选择的任何项目的属性。
元素上下文菜单
在乐谱中,每一个元素都有一个右键菜单。您可以通过鼠标右键单击某元素,或者按下Shift+F10(有些电脑键盘在右Ctrl键旁边还有一个菜单键)。每种元素的右键菜单里的内容都不尽相同,您可以大胆地尝试,看看不同元素的右键菜单里面有些什么。例如,当您右键单击一个小节的空白部分时,右键菜单会包括谱表/分谱属性和小节属性的选项。目前来说,这是唯一打开这些对话框的方法。
UI 上下文菜单
在乐谱之外,“右键菜单”通常是一个有一个齿轮图标或者是三个点图标的按钮。您可以按下按钮打开菜单。有时候按钮会与其他的界面相关联,例如在符号面板中每一个分类都有一个菜单。在这里,除了直接按那个有三个点图标的按钮以外,您可以右键任意一个分类,或者用键盘选中它,然后按Shift+F10或菜单快捷键打开这个菜单。
导航
滚动
鼠标滚轮
- 您能使用滚轮上下滚动界面。
- 您能使用Shift加滚轮左右滚动界面。
滚动条
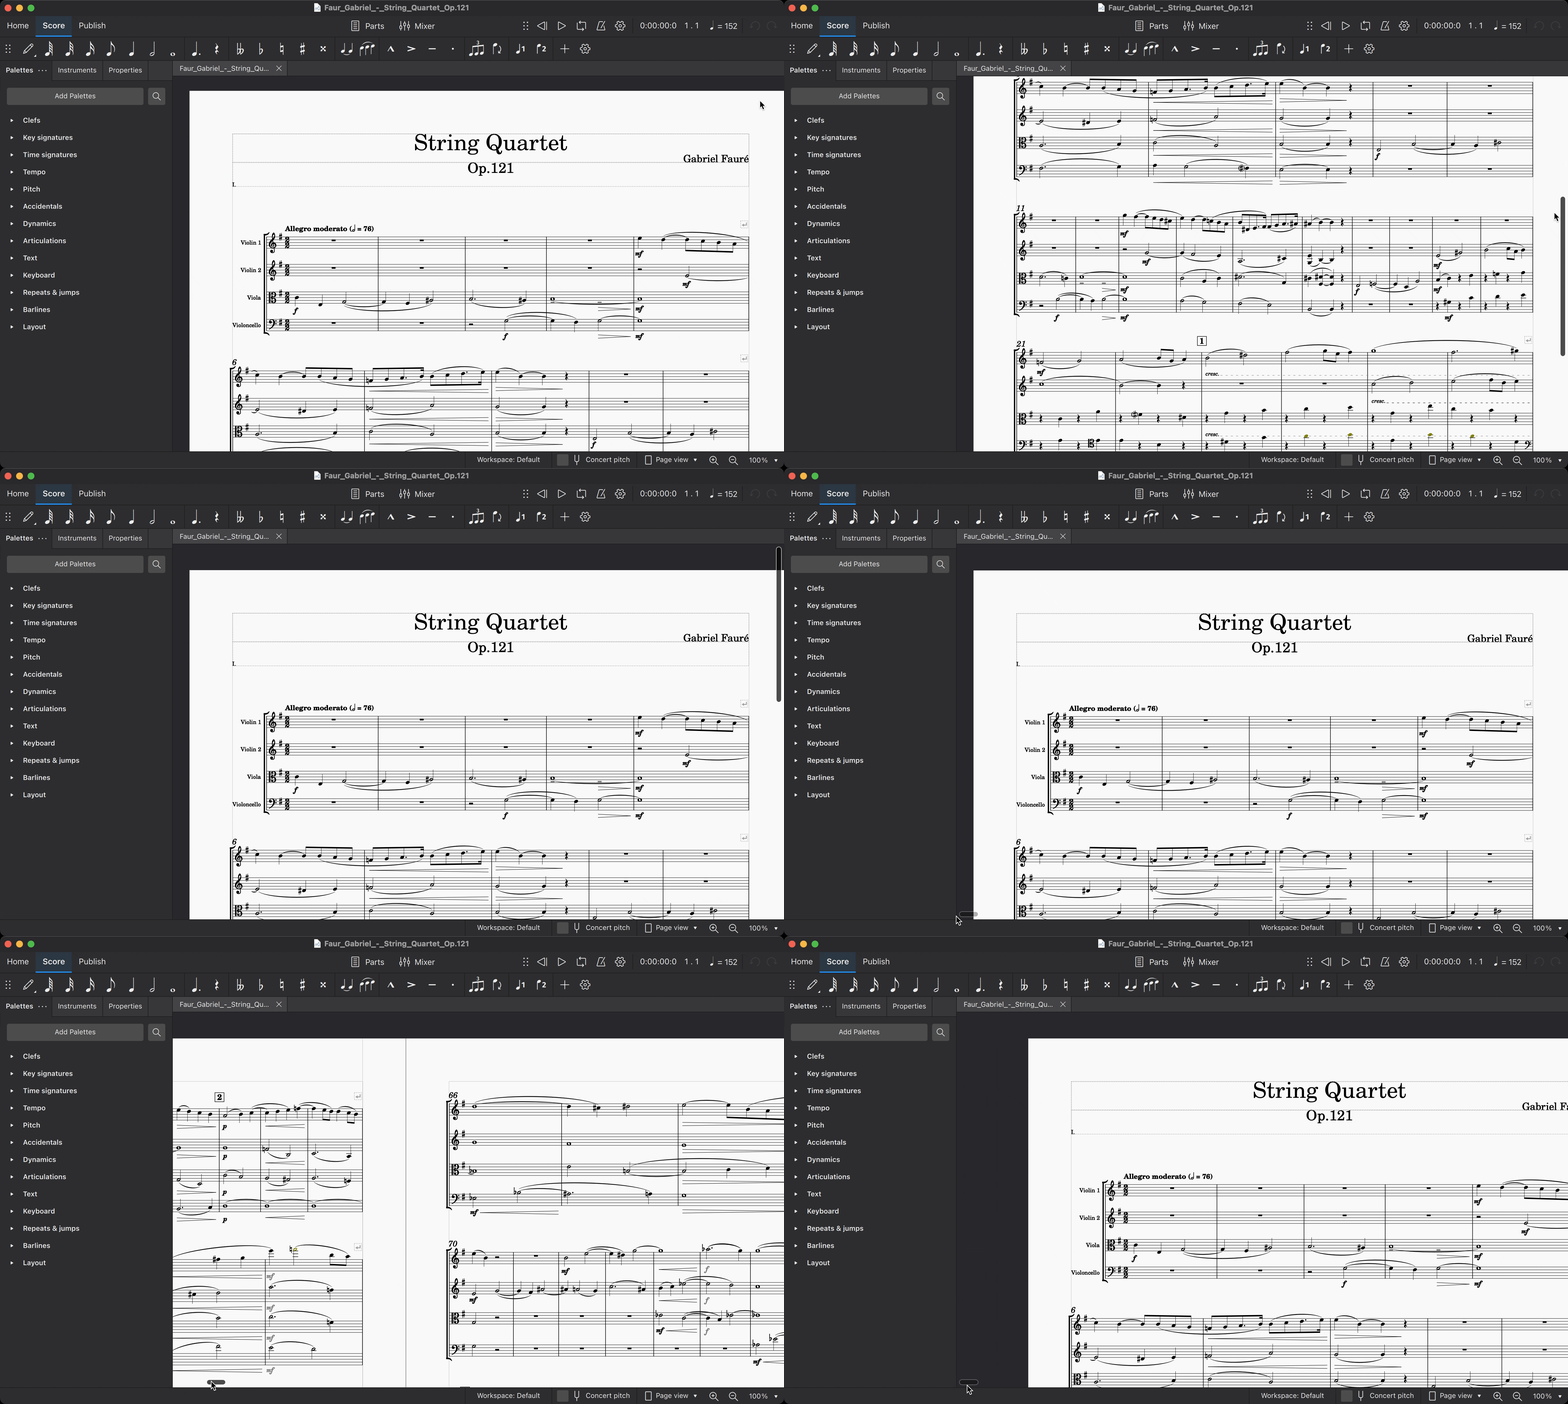
在乐谱的右侧和底部有两个滚动条。拖动它们可以快速上下或左右移动乐谱。大部分时候滚动条会被隐藏,但您可以通过将鼠标悬停在乐谱的边缘来让它们显示出来。
键盘
您还可以使用键盘上的PgUp、PgDn、Home、以及End键来滚动乐谱。如果您的键盘没有这些专门的按键,大部分情况下您可以按住Fn或其他具有类似功能的按键,然后分别按下上、下、左、或右。
注意:按PgUp或PgDn键并不是一次滚动一页,而是一次滚动一个屏幕的宽度。如果您想让屏幕一次滚动一整页,您可以在按下PgUp或PgDn的同时按住Ctrl(Mac:Cmd⌘)键。
在元素之间切换
当您在乐谱中选中一个元素的时候,您可以像操纵光标一样使用常用的键盘快捷键来更改光标的位置,从而选中其他的元素。
按下左或右键可以在相邻的音符(或休止符)之间切换。如果您想一次跳过一个小节,您可以在按下左或右键的同时按下Ctrl(Mac:Cmd⌘键。
您可以按下Alt+Up或Alt+Down(Mac:Option⌥+Up或Option⌥+Down)键让光标在不同音符,声部,谱表之间纵向移动。
您也可以使用快捷键Alt+左或Alt+右(Mac:Option⌥+左或Option⌥+右)键来选中除了音符和休止符以外的几乎任何其他元素(包括奏法文本、小节线、渐强渐弱记号等)。
另外,您可以按下Ctrl+Home(Mac:Cmd⌘+Home)来选中整个乐谱的第一个元素,或者按下Ctrl+End(Mac:Cmd⌘+End)来选中整个乐谱的最后一个元素。同样地,对于有些没有直接的Home和End键的键盘,大部分系统都可以通过按Fn+Left或Fn+Right来代替。
参阅默认键盘快捷键了解更多信息。
导航视图
导航视图是一个能够展示乐谱缩略图的面板。您可以点击视图 → 导航面板打开或关闭导航面板。
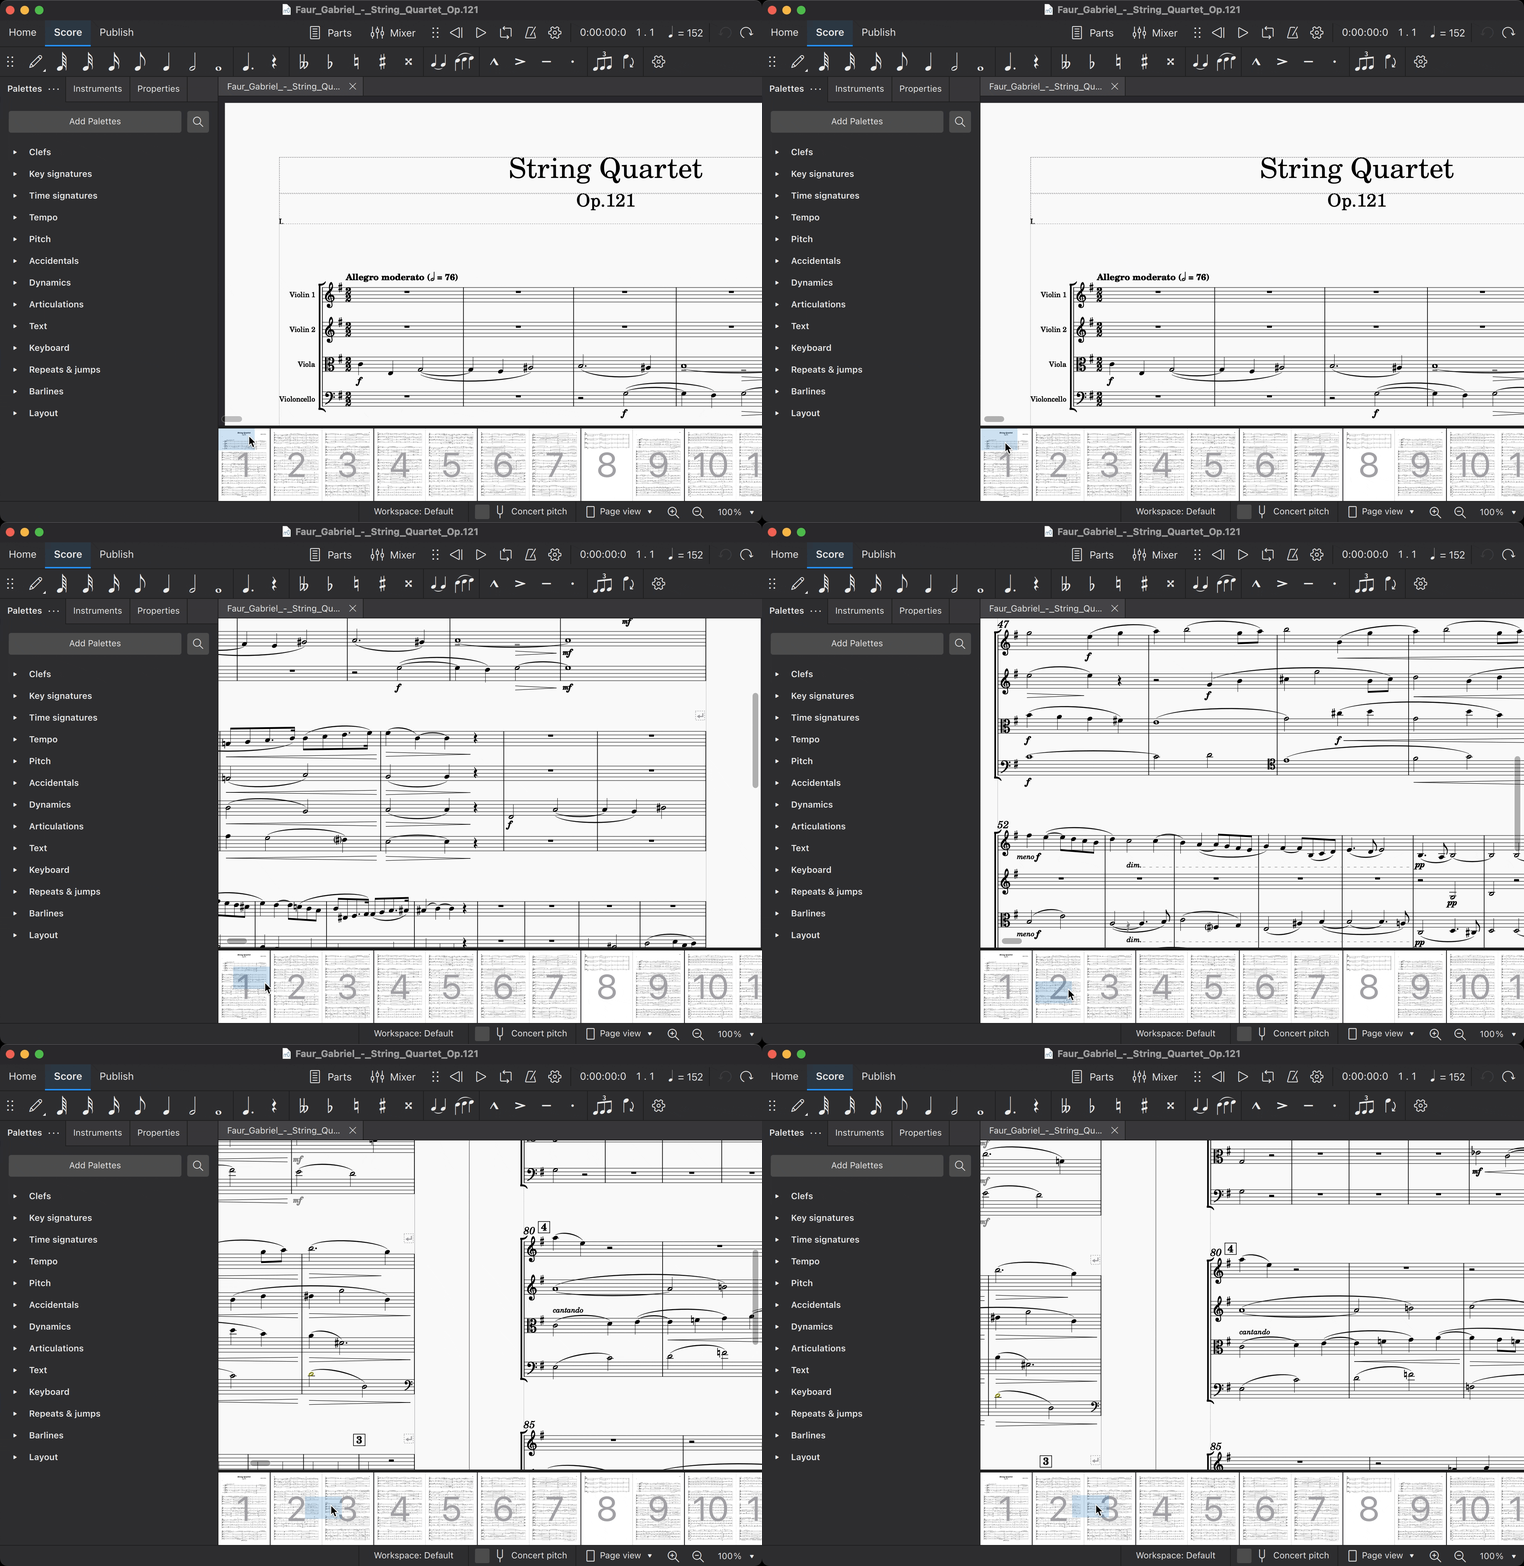
导航面板里面的蓝色边框代表了当前屏幕显示的乐谱区域。您可以拖动方框来移动乐谱。
时间轴
时间轴是一个用来显示乐器和乐谱结构的辅助工具。参阅时间轴了解更多。
视图
您可以在状态栏右侧的弹出窗口中切换不同的乐谱视图。
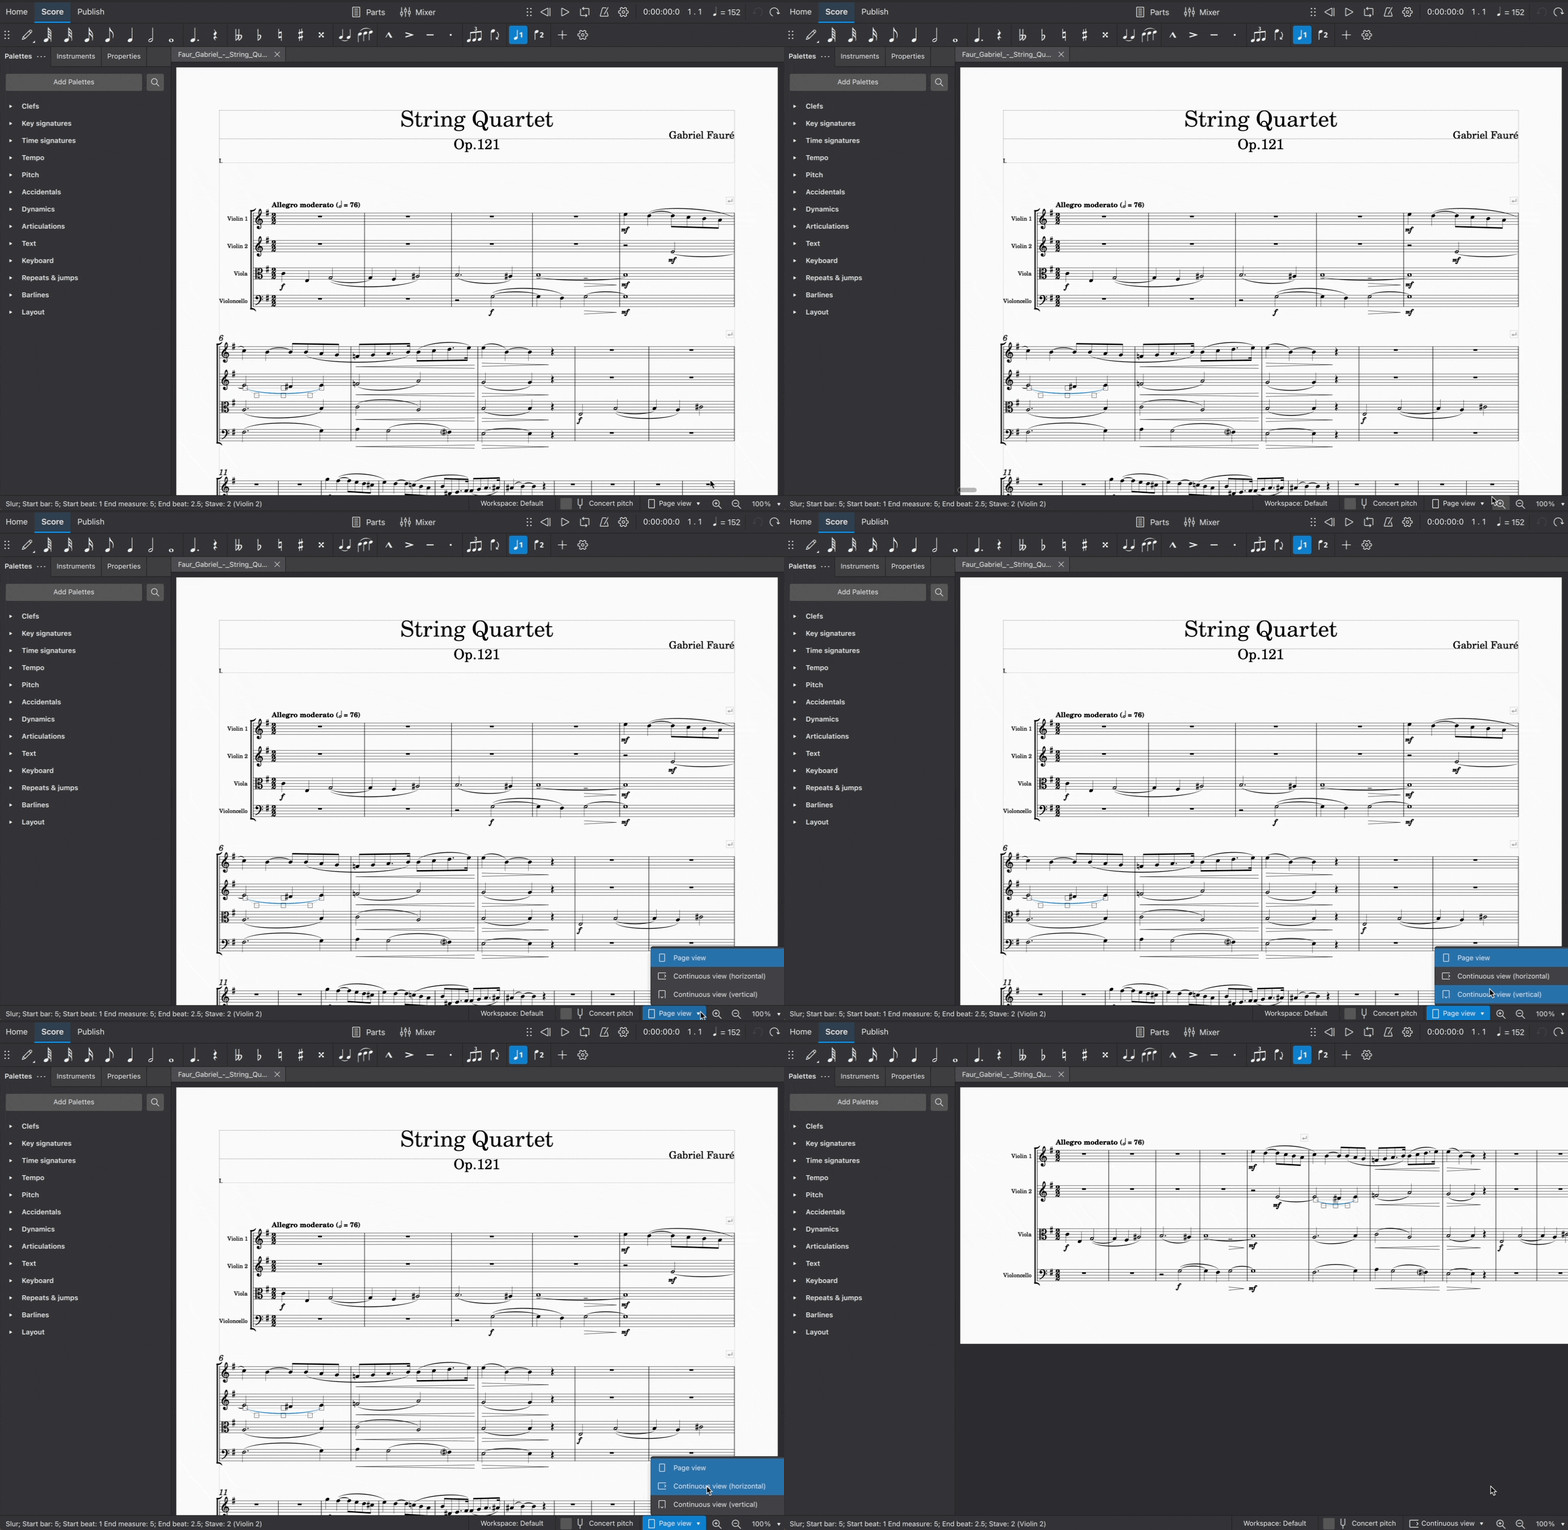
多页视图
多页视图将乐谱按被打印或导出成 PDF 文件的样子显示(每一页单独显示,且带有页边距)。Musescore 能够根据页面设置和偏好设置中的设置自动应用换行符和分页符。另外,您还可以自己插入换行符和分页符。
单行连续视图
单行连续视图将乐谱不间断地显示在屏幕上。即便乐谱的起点不在屏幕中,小节号、乐器名称、谱号、调号和拍号也会被显示在窗口的最左侧。
垂直连续视图
乐谱被一页一页显示,页面具有页眉,但是没有页边距,并且能够垂直无限延申。Musescore 能够根据页面设置和偏好设置中的设置自动应用换行符和分页符。另外,您还可以自己插入换行符和分页符。
缩放
下面列出了一些能够缩放乐谱的方法:
放大
Ctrl++(Mac:Cmd⌘++)
或在按下Ctrl(Mac:Cmd⌘)的同时向上滚动鼠标滚轮。
缩小
Ctrl+-(Mac:Cmd⌘+-)
或在按下Ctrl(Mac:Cmd⌘)的同时向下滚动鼠标滚轮。
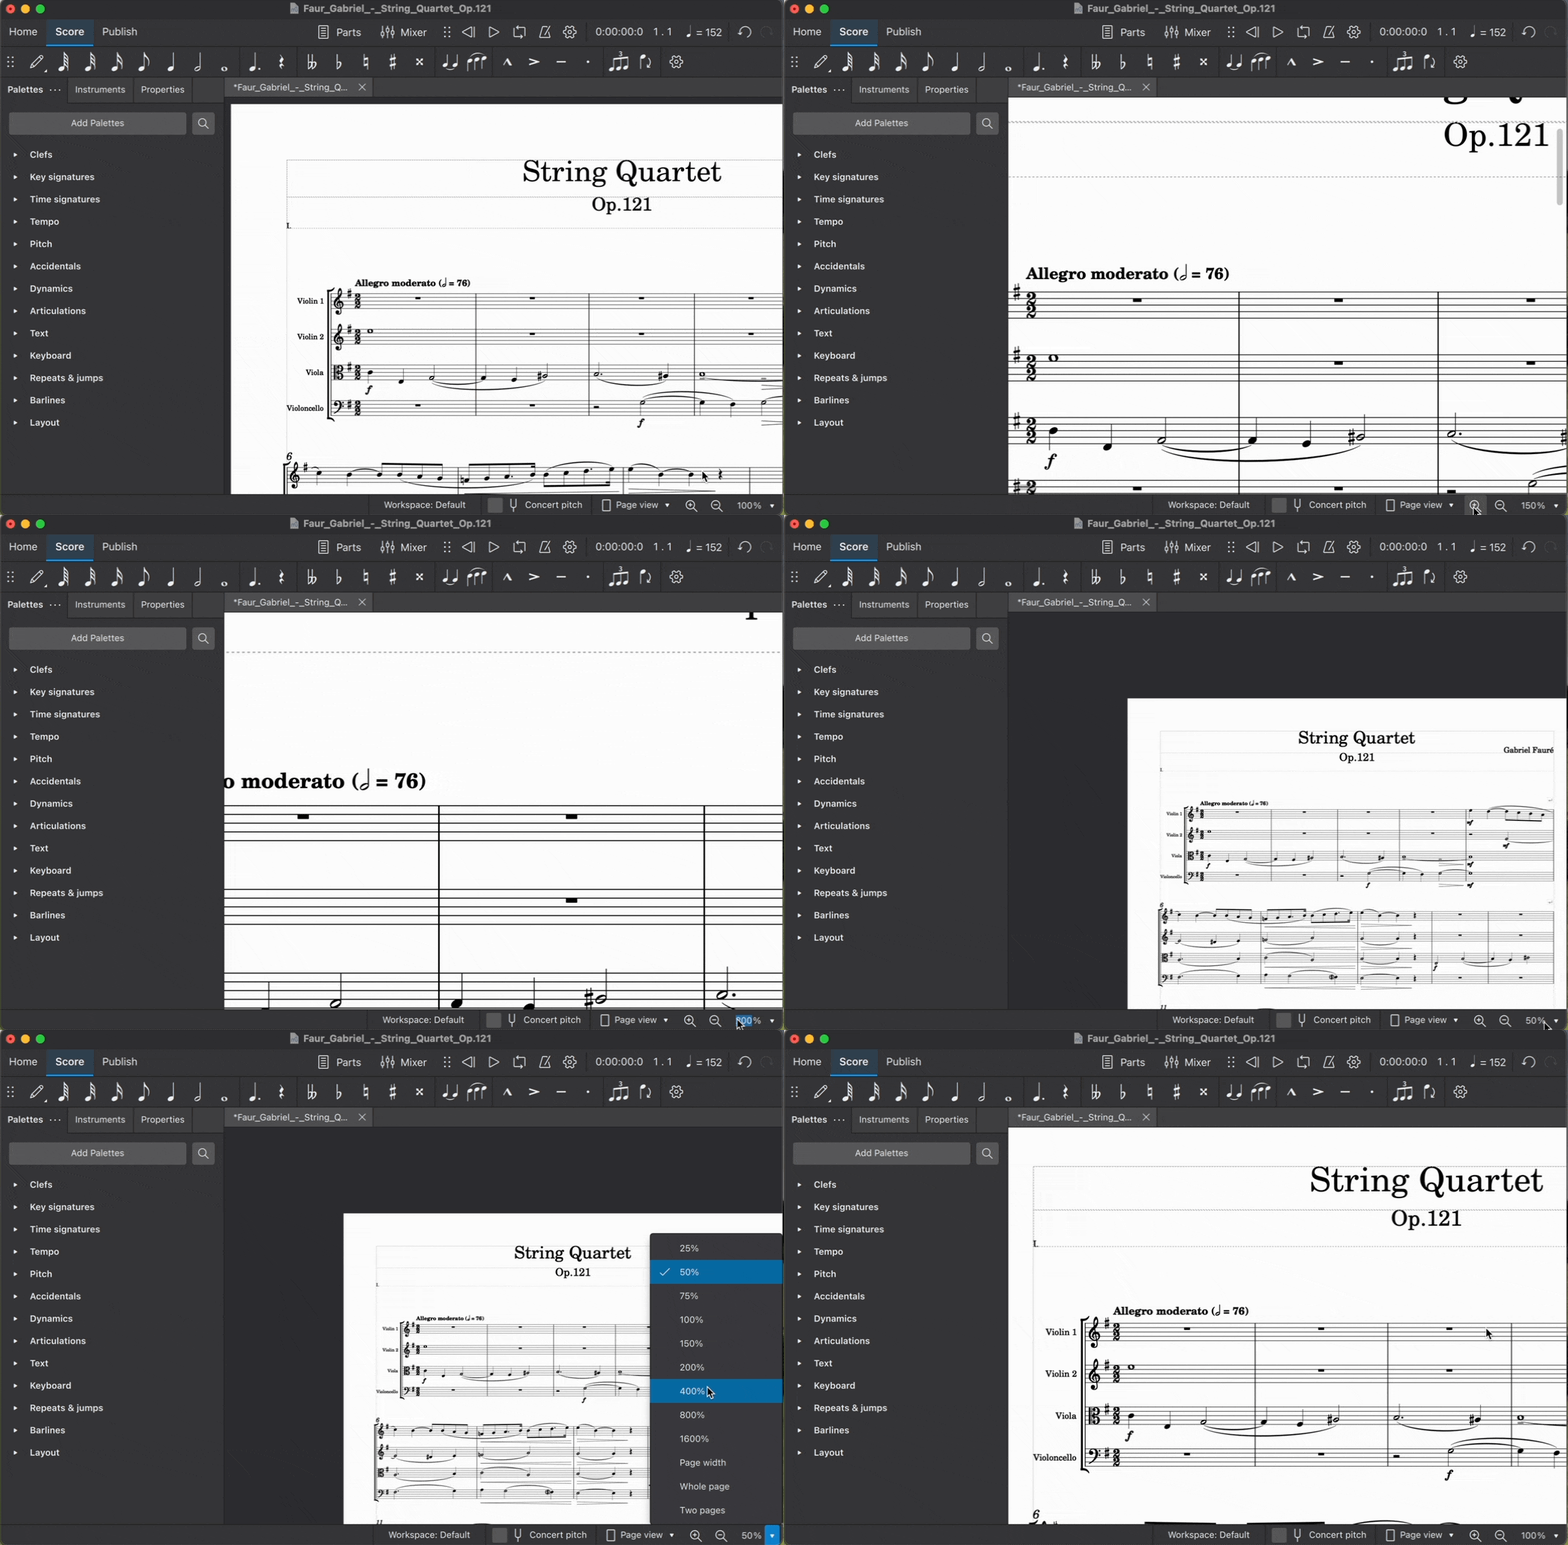
状态栏缩放控制
您可以通过下面方法从状态栏用鼠标放大或缩小您的乐谱:
- 点击状态栏右侧的放大镜图标。
- 单击这些图标右侧的数字,然后输入自定义缩放倍数
- 在最右边的弹出列表中选择一个预设的缩放倍数
回到100%缩放
下面操作能将缩放恢复至默认倍数(100%)。
Ctrl+0(Mac:Cmd⌘+0)
查找/前往
查找/前往面板可以让您在乐谱中快速找到一个特定的小节,排练记号或页码。
您能够按下面操作打开查找/前往面板
- 找到编辑 → 查找/前往,或
- 按下Ctrl+F(Mac:Cmd⌘+F)。
您能够按下面操作关闭查找/前往面板
- 单击面板左上角X(关闭)按钮,或
- 当面板被选中是按下Esc键。
跳转到特定小节号
输入小节号(从1开始计数,不包括弱起小节、中断或者手动更改小节号)。
跳转到特定页码
输入页码,格式为pXX(其中XX是页码)。
跳转到数字排练记号
输入rXX(其中XX是排练记号)。
跳转到字母排练记号
输入排演记号的名称(搜索不区分大小写)。
高级技巧:最好避免使用单个字母“R”,“r”,“P”,“p”或其中一个字母与另一个整数(例如“R1”或“p3”)来命名排练记号,因为这可能会混淆搜索算法。
时间轴
概述
时间轴能逐个小节显示乐器和乐谱中主要要素的变化情况。它显示在整个窗口的底部。您可以通过单击任何一个小节或者要素轻松地跳转乐谱到您选择的位置。
时间轴分为四个部分:
要素标签
要素标签在整个时间轴界面的左上角。每一行都展示了后续对应的要素的名称。
乐器标签
乐器标签在整个时间轴界面的左下角。这些是主网格中每一行的对应的乐器名称。
要素
乐谱中的主要要素的变化可以显示在整个时间轴界面的右上角。它们体现了整个乐谱在不同地方的元数据。
主网格
主网格在整个时间轴界面的右下角。每一个网格中的正方形都对应了一个乐谱中某一乐器的某一小节。
要素
要素是指那些虽然不是音符,但是仍然对乐谱有重要作用的元素。例如调号、拍号、速度、排练标记、小节线和反复或跳跃记号。

基础操作
选中某一小节
您可以通过单击某一单元格来选中时间轴中的某一个小节。当小节被选中后,这个单元格周围会出现一个蓝色的框,并且乐谱中的对应小节也会被同时自动选中,屏幕会自动跳转到您选择小节的位置。
选中多个小节
拖动选择
要拖动选择多个小节,您可以在按住Shift的同时按住鼠标左键并将鼠标在主网格上拖动。这会创建一个选择区域。松开鼠标后,所有在选择区域范围内的单元格以及对应乐谱中的小节都会被选中。
[Shift]选择
与在乐谱中的操作类似,如果一个单元格已经被选中,您可以按住Shift的同时单击时间轴上的另一个单元格来将选区延申至那个单元格。
[Ctrl]选择
如果当前没有选中任何单元格,按住Ctrl的同时再单击某一个单元格会选中一整列。
清除选区
您可以通过按下Ctrl的同时单击任意一个网格或要素来清除当前的选区。
选中某一特定要素
在时间轴上选中任意一个要素都会在乐谱中选中对应的要素。
滚动
鼠标滚轮
向上或向下滚动鼠标滚轮将分别向上或向下移动网格和乐器标签。要素标签和要素不会移动。
[Shift]滚动
按住Shift后,向上或向下滚动鼠标滚轮将分别向左或向右移动网格和要素。要素标签和乐器标签不会被移动。
[Alt]滚动
按住Alt后,向上或向下滚动鼠标滚轮将分别向左或向右移动网格和要素,且比按下Shift后移动的速度更快。要素标签和乐器标签不会被移动。
拖动
按住鼠标左键并移动可以拖动时间轴的内容。
标签操作
重新排列要素标签
除了小节号之外的所有要素标签都可以以任何方式被重新排列。将鼠标光标移动到某一个要素标签上后,该要素标签右侧将出现小的上下箭头。您可以用鼠标左键单击上箭头将要素标签与上面的要素标签交换,单击下箭头上的鼠标左键将要素标签与下面的要素标签交换。
折叠要素标签
您可以单击小节号的要素标签将其他所有要素折叠,这不会删除时间轴上的要素。所有其他的要素都会被折叠成一行,不同种类的要素在里面交错排列。您可以再次单击小节号的要素标签将其他所有要素展开。

隐藏乐器
不论隐藏与否,所有的乐器都会被显示在时间轴上。这个功能只能够将某一乐器从乐谱中隐藏。想要在乐谱上隐藏或显示乐器,您可以将鼠标光标移动到乐器标签上,然后单击出现在乐器标签右侧的小眼睛图标。如果乐谱上这个乐器是可见的,小眼睛图标就是睁着的,如果乐谱上这个乐器是不可见的,小眼睛图标就是闭着的。您可以单击这个小眼睛来在两个状态间切换。

缩放
要放大或缩小时间线,您可以按住Ctrl(Mac: Cmd),然后滚动鼠标滚轮。
Braille
Overview
MuseScore 4.1 added a braille panel that displays the current measure in braille music notation. The content is similar to what you get if you export braille via the File menu, but the braille panel updates live as you navigate through the score.
As of MuseScore 4.2, the braille panel can be used to enter notes and some musical symbols using Perkins-style 6-key braille input.
Output to a physical braille display
The contents of the braille panel can be displayed on a braille terminal connected to your computer (e.g. via Bluetooth or USB).
The following limitations apply when using a physical braille display:
- NVDA must be used as the screen reader.
- MuseScore’s braille panel must have keyboard focus.
- When the score has focus, the braille terminal will just show ordinary status text from the screen reader.
- Braille navigation and 6-key input must be performed with the computer keyboard.
- Physical buttons on the braille terminal are not used, except to scroll within a measure that is too long to fit on your display.
Please let us know in the Documentation forum if you discover a way to bypass any of these limitations.
Terminology: braille vs. print
On this page, we refer to MuseScore's ordinary stave notation as "print music". This is the traditional music notation that sighted musicians use on paper or electronic devices, and is displayed in the central region of MuseScore's main window, known as the score view.
Braille can also be used on paper, but it's not printed with ink. Instead, it's embossed as raised dots, which blind musicians read by touch. It is common in accessibility circles to use the word "print" to mean non-braille notation.
Viewing braille
To open or close the braille panel
- Go to Preferences > Braille.
- Check (or uncheck) the Show braille panel box.
The braille panel appears directly below the score in MuseScore’s main window.
To focus the braille panel
With the braille panel open, press the Tab key while the score has focus. A caret (text cursor) will appear in the braille at the position of whatever element was selected in the score. For example, if a note was selected in the score, the text caret will appear on that note in the braille.
Press Shift+Tab at any time to leave the braille panel and return to the score. The braille panel will remain open so you can navigate to it again with Tab.
Navigating the braille
While the braille panel has focus, you can move the text caret around using the arrow keys. As the caret moves through the braille, the element to the right of the caret becomes selected in the score. If that element is a note, MuseScore will play the sound of the note.
The braille panel only shows one measure at a time, but it shows that measure for all instruments in the score. Each line of braille corresponds to a staff in the print notation, so grand staff instruments like the piano get two lines of braille, and the organ gets three lines.
If a staff has lyrics, these are written on another line of braille immediately below the line corresponding to that staff. If there are multiple lines of lyrics (e.g. for multiple verses), each line of lyrics is written on a separate line in the braille.
Shortcuts for navigation
The following keyboard shortcuts are available for navigating the braille.
| Action | Windows/Linux | macOS |
|---|---|---|
| Go to next braille cell | Right | Right |
| Go to previous braille cell | Left | Left |
| Go to braille line above | Up | Up |
| Go to braille line below | Down | Down |
| Go to next measure | Ctrl+Right | Cmd+Right |
| Go to previous measure | Ctrl+Left | Cmd+Left |
| Go to beginning of score | Ctrl+Home | Cmd+Fn+Left |
| Go to end of score | Ctrl+Emd | Cmd+Fn+Right |
| Toggle braille input mode on/off | N | N |
Writing braille
Notes and certain musical symbols can be entered in the braille panel using a 6-key method of braille input similar to that of the Perkins Brailler.
Turn braille input mode on or off
While the braille panel has focus, press N to toggle braille input mode on or off.
Constructing a braille cell
While in braille input mode, six letter keys on the computer keyboard are used to represent the six braille dots that make up a single braille cell (⠿).
The keys used are F, D, S for dots 1, 2, 3 down the first column of the cell, and J, K, L for dots 4, 5, 6 down the second column. The Space key is used to represent an empty braille cell (⠀), sometimes referred to as dot 0.
Up to six of these keys can be pressed in combination to construct any pattern of raised dots. For example, to enter a quarter note C, which in braille is ⠹ (i.e. dots 1, 4, 5, 6), press and hold F+J+K+L, then release these keys to confirm the pattern. The keys can be pressed and released in any order, providing at least one key is held at all times, until you have completed the pattern.
When the final key is released, MuseScore reads your braille pattern. If your pattern corresponds to a recognized note or musical symbol then this element is entered directly in the score, not in the braille panel, because print notation is the "ground truth" for MuseScore. Once the element is in the score, the braille panel automatically updates to reflect this change.
Sometimes in music braille, the same information can be expressed in multiple ways. For the sake of consistency, MuseScore always picks the same way regardless of how you entered the notation. Therefore, the braille that appears in the braille panel may not exactly match the pattern(s) you entered with the six keys, though it will have the same meaning.
Entering notes
Basic notes
In braille, eighth notes (quavers) and 128th notes are written as:
| Note | Braille | Dots | Keys |
|---|---|---|---|
| C | ⠙ | 1, 4, 5 | F+J+K |
| D | ⠑ | 1, 5 | F+K |
| E | ⠋ | 1, 2, 4 | F+D+J |
| F | ⠛ | 1, 2, 4, 5 | F+D+J+K |
| G | ⠓ | 1, 2, 5 | F+D+K |
| A | ⠊ | 2, 4 | D+J |
| B | ⠚ | 2, 4, 5 | D+J+K |
Additional dots are added to the above sequences to create other durations:
| Duration | Braille | Dots added | Keys added |
|---|---|---|---|
| Quarter (crotchet) and 64th notes | ⠠ | 6 | L |
| Half (minim) and 32nd notes | ⠄ | 3 | S |
| Whole (semibreve) and 16th notes | ⠤ | 3, 6 | S+L |
Hence a quarter note C is ⠹ (dots 1, 4, 5, 6) and is entered with F+J+K+L. This pattern is also used for a 64th note C.
16th notes and smaller
As mentioned above, 16th notes and smaller use the same dot patterns as larger durations. When reading braille, you can work out whether the shorter or longer duration is being specified by looking at the time signature as well as other notes in the measure. However, when writing braille, you need to tell MuseScore which durations you want to use.
| ⠤ | ⠄ | ⠠ | ⠀ | Dots to select | Keys to select | |
|---|---|---|---|---|---|---|
| Group 1 | whole | half | quarter | eighth | 0, 1 | Space+F |
| Group 2 | 16th | 32nd | 64th | 128th | 0, 2 | Space+D |
By default, MuseScore enters group 1 durations (whole, half, quarter, eighth). To switch to group 2, enter dots 0, 2 (i.e. press Space+D). Nothing will appear in the braille panel, but any notes or rests you write from now on will be in group 2 (16th, 32nd, 64th, 128th). To switch back to group 1 durations, enter dots 0, 1 (i.e. press Space+F).
It's not currently possible to enter durations of 256th and smaller, or breve (double whole) and larger, via the braille panel.
Dotted notes
Braille uses ⠄(dot 3) to represent an augmentation dot, which is added in a new braille cell immediately following a note. No other cells are allowed to come between the note and its augmentation dot.
To create a dotted note in the braille panel, first write the main note duration using the rules above, then follow it with dot 3 (i.e. press S).
For example, a dotted quarter note C is ⠹⠄, which can be stated as dot pattern 1456-3, where the dash means to start a new cell. In terms of keys, this is F+J+K+L, S.
It's not currently possible to enter multiple dot 3s to create double and triple dotted notes via the braille panel.
Octave marks
Octave marks in braille serve a similar purpose to clefs in print music. If you see a note in print, you don't know what pitch it is until you look at the preceding clef. In braille, if you see ⠙ (dots 1, 4, 5) then you know the note is a C, but it could be a C in any octave. To determine the octave, you need to look at the preceeding octave mark (and also at any notes between that octave mark and the current note).
A standard 88-key piano has 7 complete octaves. Starting on the lowest C, which is called C1 in braille as well as in scientific pitch notation, the first complete octave of white notes is C1, D1, E1, F1, G1, A1 and B1. After B1 comes C2, which is the start of the second complete octave. This scheme continues up to the final complete octave, which starts with C7 and ends with B7.
In this system, C4 is middle C, and A4 is "concert A" (i.e. the note that the orchestra tunes to at the start of a performance). Enharmonic spelling is important, so B♯3 sounds the same as C4 despite being notated in a different octave, and C♭4 sounds the same as B3.
Even standard 88-key pianos have a few notes outside the range C1 to B7. Braille refers to the C0 octave as the "sub" octave, and the C8 octave as the "super" octave. These simply double the markings used for the first and seventh octaves.
| Octave | Marks | Dots | Keys |
|---|---|---|---|
| 0 (sub) | ⠈⠈ | 4-4 | J, J |
| 1 | ⠈ | 4 | J |
| 2 | ⠘ | 45 | J+K |
| 3 | ⠸ | 456 | J+K+L |
| 4 (middle) | ⠐ | 5 | K |
| 5 | ⠨ | 46 | J+L |
| 6 | ⠰ | 56 | K+L |
| 7 | ⠠ | 6 | L |
| 8 (super) | ⠠⠠ | 6-6 | L, L |
When specified, octave mark are placed immediately prior to a note. So a middle C quarter note is ⠐⠹, or dots 5-1456, which is entered as K, F+J+K+L. No other cells are allowed to go between the octave mark and the note it belongs to.
Octave marks don't have to be given before every note. Octave marks are only required for the:
- First note on each line of braille.
- First note after a double bar line, number sign, word indicator, and certain other markings.
- Second of two notes separated by a melodic interval of a sixth or more, regardless of their octaves.
- Second of two notes separated by a melodic interval of a fourth or more, only if their octave numbers are different.