入門
本章將幫助您安裝和首次運行 MuseScore,還將介紹一些學習和幫助資源。
學習使用MuseScore
MuseScore提供眾多的學習資源可幫助新用戶入門。
導覽
當您第一次使用MuseScore時,開始嚮導帶您設置軟體的基礎功能。功能之一叫做導覽,正如其名,它將帶領您領略程式的特色。
- 要開啟這項功能,請在開始嚮導的導覽頁面,勾選"是"來回應"您想觀看導覽嗎?"
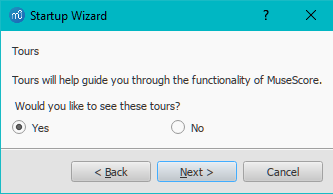
這將會允許導覽在程式開啟時運行,以向您介紹使用者介面的特色功能。

- 要結束導覽:請按下Close按鈕。
- 不再顯示導覽:請取消勾選“繼續顯示導覽”。
- 要再次顯示導覽(當程式重啟時):請選擇幫助→導覽→顯示導覽。
- 要從頭再看導覽 (當程式重啟時):請選擇幫助→導覽→重設導覽。
目前提供的導覽有:
- 使用者介面介紹。
- 音符與休止符輸入。
- 符號面板輸入。
- 時間軸導覽。
- 鍵盤輸入方法導覽
- 如何添加多小節休止符
- 符號的自動佈局
- 使用檢視器來修改屬性
- 選取元素
- 在樂譜中加入並編輯線性符號
新手入門樂譜
新手入門是一個實踐性的、介紹音符輸入基礎技能的互動式樂譜。當您首次打開MuseScore,它會顯示在啟動中心的主視窗上,只需要輕點打開。照著藍字顯示的步驟,您將體驗樂譜輸入的基礎技巧。
提示:若您看不到新手入門樂譜,您可以查看在啟動中心的右邊欄,點擊左/右箭頭直到滾動到相關頁面。
影片教程
MuseScore提供一整套教學影片,每個影片涵蓋了一個主題。你能通過不同方式收看影片。
其他教程
在musescore.org的教程部分你將發現更多特別的話題。(比如MuseScore鼓譜)。
影片
- Lesson 1- Score setup
- Lesson 2 - Working with MuseScore
- Lesson 3 - Note Input
- Lesson 4 - MIDI keyboard input
- Lesson 5 - More Input Ideas
- Lesson 6 - Text, Lyrics, and Chords
- Lesson 7 - Tablature and Drum Notation
- Lesson 8 - Repeats and Endings, Part 1
- Lesson 9 - Repeats and Endings, Part 2
- Lesson 10 - Articulations, Dynamics and Text
- Lesson 11 - Layout and Parts
獲得幫助
若您在使用MuseScore時遇到問題,有幾種途徑可以幫到您:
使用手冊
要查閱使用手冊:
在MuseScore官網:從功能表選擇 支持手冊。
在MuseScore程式中:選擇頂部功能表列的 幫助 線上手冊 。
您可以用功能表流覽使用手冊,或者搜索一下。
環境幫助
如果您選中樂譜中的一個元素,並按下F1,會打開使用手冊,其中會展示一組和該元素相關的連結。
論壇
MuseScore 提供了一些線上 論壇 供用戶交流。你可以在帖子中找到你遇到問題的可能解決方案。 使用網站的 通用搜索 將會返回帖子和使用手冊中的內容。
如何
有些操作需要多個在使用手冊中很難發現技巧。這些解決方案可在How To's(英文) 中找到
發佈一個問題
如果你找不到你需要的答案,你可以在 Support and bug reports(英文) 論壇發佈帖子提問。
當您發佈一個問題時:
請儘量清晰明確描述您的目的,以及您為了解決問題做了哪些嘗試。
請附上出問題的譜子,這會使他人更方便地瞭解問題— 使用頁面底部的「附件」選項,然後點擊儲存(本譯文)以及預覽按鈕。
報告錯誤
如果您遇到一些您認為是Bug的問題,首當其衝應當將它發表在支持與Bug回饋論壇。這會讓他人幫忙檢查這是否是個真的Bug,並給出變通辦法來讓您繼續樂曲的創作。詳情請閱錯誤回饋與功能請求。
安裝說明
MuseScore有適用於不同作業系統的版本,包括Windows、macOS, 以及多種Linux發行版本系統和幾個BS變種。所有安裝包均可從MuseScore下載頁獲得。
安裝說明
當您下載軟體後,請按照您所屬的作業系統的安裝步驟:
在Windows上安裝
在macOS上安裝
在Linux上安裝
在Chromebook上安裝
首選項
安裝後首次運行MuseScore 時,您將會被問及幾個問題來確定你的首選項:
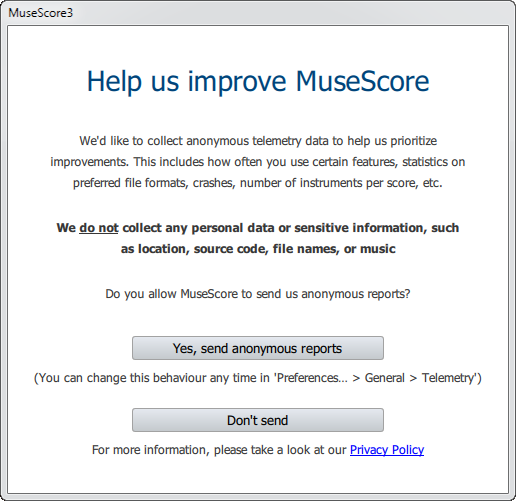
首先,您可以選擇授權MuseScore(3.4或更高版本)來收集使用資料,點擊 是的,發送匿名報告 或者 不發送 繼續:
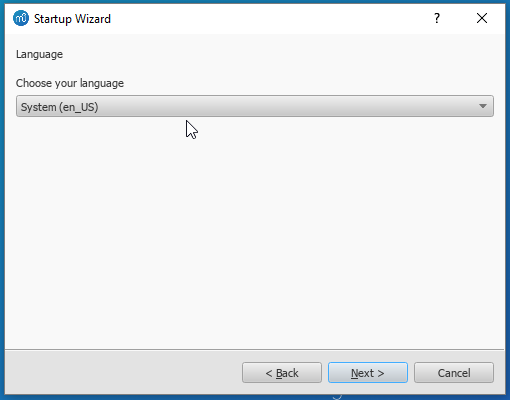
語言設置和鍵盤輸出已在安裝時設置好,通常無需更改。只需按下一步來繼續:
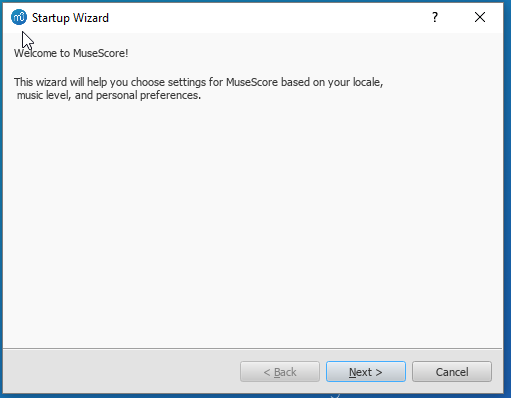
緊接著:
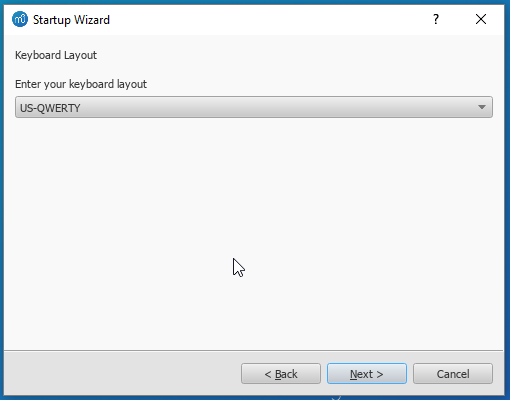
工作區頁面讓您選定預設工具列與面板。從下拉清單選擇一個選項。然後點擊下一步 來繼續:
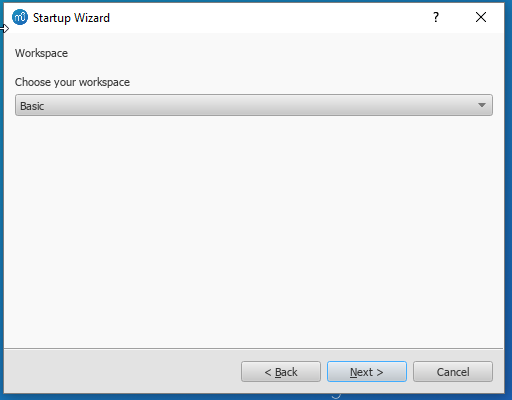
此時軟體會問您是否要觀看教程導覽。若您是新手MuseScore請點擊'是' 選項,然後點 下一步來繼續:
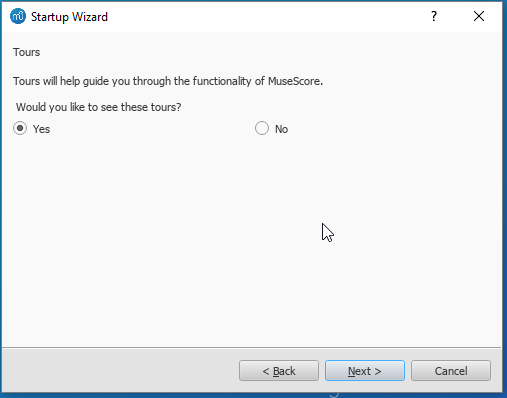
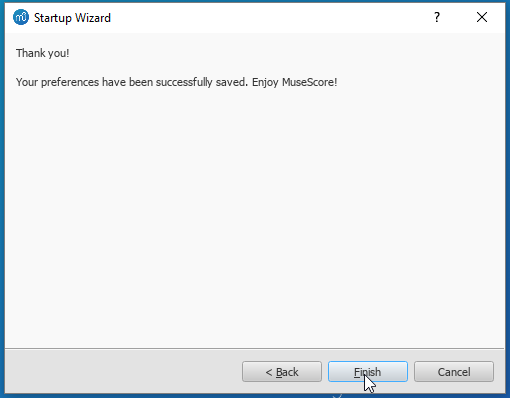
最後點擊結束來開始使用Muse Score。
MuseScore, MuseScore 3, MuseScore 4
What does this handbook cover
This handbook describes features of MuseScore Studio, the music notation program for Windows, macOS, and Linux supporting a wide variety of file formats and input methods. MuseScore Studio features an easy to use WYSIWYG editor with audio score playback for results that look and sound beautiful, rivaling commercial offerings like Finale and Sibelius. "Musescore Studio" was previously named "MuseScore", see online announcement.
MuseScore Studio is released as a free and open-source software. Musescore Studio 3 is released under the GNU General Public License version 2. Musescore Studio 4 is released under the GNU General Public License version 3. To learn more about the GPL license, visit http://www.gnu.org or http://www.gnu.org/licenses/gpl-faq.html. To download MuseScore Studio 3.6.2, see Installation: Download and installation chapter.
MuseScore Studio is developed and supported by non paid volunteers and managed by Muse Group employees. MuseScore BVBA is a subsidiary of Muse Group. Source: wikipedia, forum discussion.
What is not covered in this handbook
The following items are often referred to as "MuseScore". However, as explained above, this handbook uses "MuseScore" to refer to "MuseScore Studio" only, "MuseScore" is not used to refer to any of the following unless otherwise specified.
- The score viewer and playback mobile apps (Android, iOS), or
- The score viewer and playback interface provided by musescore.com
See How and where to ask for support
Different versions of MuseScore Studio
MuseScore Studio is open-source. Its source code is available at github.
MuseScore Studio 3.6.2 is the last official release of MuseScore Studio 3, see Version information. For forks (wikipedia), see "External Link" section.
MuseScore Studio 4 is a result of continuous development from MuseScore Studio 3.6.2. It has huge playback and countless engraving improvements. After MuseScore Studio 3.6.2 was released, most of the software development moved on to MuseScore Studio 4. Muse Group employees no longer work on bug fixing of Musescore Studio 3.6.2. Due to the substantial change in programming framework and library, some proposed improvements of Musescore Studio 3.6.2 are impossible to be merged into MuseScore Studio 4. Reimplementation of important features is not yet complete, see also discussion1, discussion2, discussion3.
When choosing a MuseScore Studio version to create scores, users should take note of the company's distribution versioning and feature implementation philosophy, and consider production needs. For example MuseScore Studio 3.6.2 Linux supports audio and MIDI routing with JACK, which has implications for automation and video synchronization. Source: https://github.com/orgs/musescore/discussions/13745
MuseScore Studio 3 and MuseScore Studio 4 can be installed and opened side by side on the same OS, see Version 3 and 4 installations side-by-side. Score files are opened by default with the last installed Musescore Studio version, see Change default programs in Windows and Problem with Shortcuts to MuseScore 4 files. You can always choose manually with "Right-click > Open with". Note that MuseScore Studio native format (*.mscz and *.mscx) are backward compatible - MuseScore Studio 4 opens MuseScore Studio 3's *.mscz without error, see Native format compatibility
External Links
Notable forks (wikipedia):
- Musescore 3.7 Evolution
- https://github.com/Jojo-Schmitz/MuseScore/wiki
- Forum discussion End of Life plan for 3.x
- MuseScore3.0dev-PianoTutor
在Windows上安裝
安裝
若您的設備運行Windows 10,可以從Windows商店安裝32位版本的MuseScore。←點選連結來跳轉到商店應用中的Musescore。在那兒,您只需點擊獲取應用>,MuseScore就會下載並安裝,隨後自動升級。
此外,您可以從MuseScore官方下載頁獲取Windows安裝包。按一下連結來開始下載。(請挑選適合您處理器構架的版本:64位或32位)。您的流覽器會向您確認下載的檔,請點擊保存檔.
完成下載後,按兩下檔開始安裝。Windows或許會向您彈出一個安全視窗以在安裝之前確認。點擊運行以繼續。
安裝現在開始
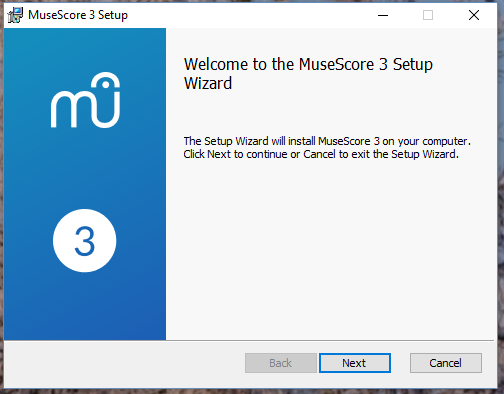
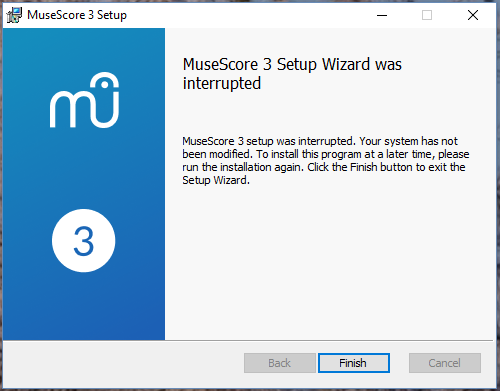
如果您在此時或之後點擊Cancel,您將會看見:
如果您點擊的是Next,安裝嚮導將顯示免費軟體許可的條款。
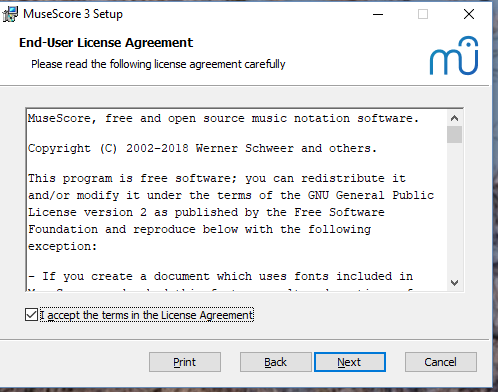
閱讀許可條款,請確保勾選了"I accept the terms in the License Agreement",然後點擊Next以繼續。下一步,安裝器將要求您確認MuseScore的安裝位置。
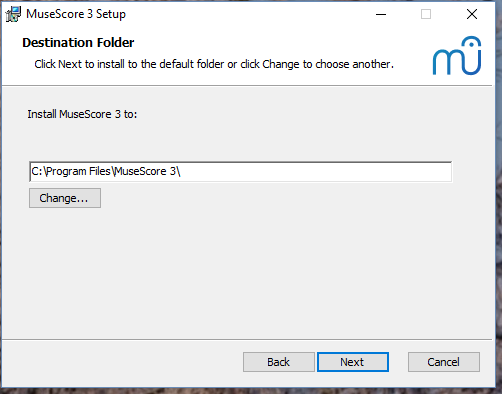
若您正安裝一個更新版本的的MuseScore但同時仍想保留舊版本軟體,那麼 您應當更改安裝路徑(請注意MuseScore 3 可以與MuseScore 1/2共存且無需任何更改)。否則請點擊Next以繼續。
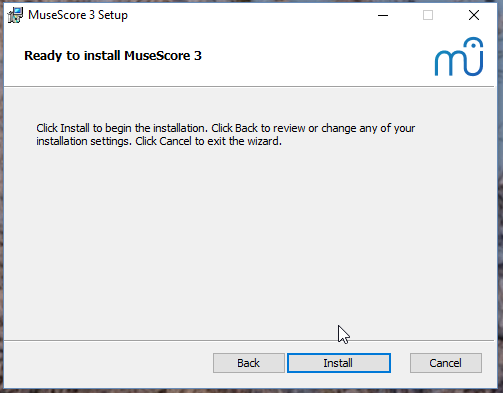
點擊Install以繼續。
安裝嚮導會花幾分鐘去安裝必需檔與配置。您將看見:
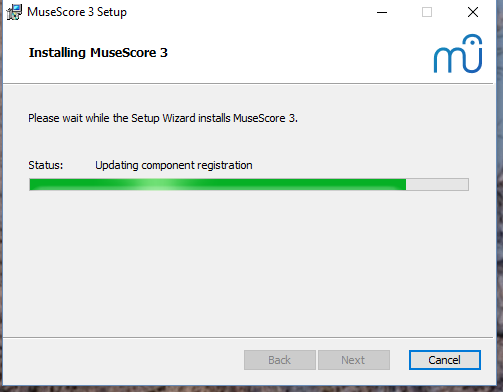
最後
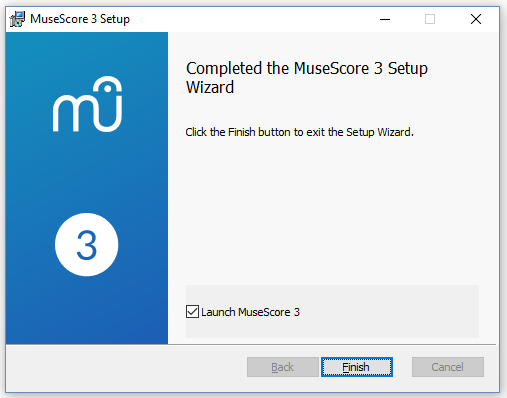
點擊Finish退出安裝器。您可以刪除已下載的安裝檔。
啟動MuseScore
要啟動MuseScore,請在功能表中選擇開始→所有程式→MuseScore 3→MuseScore 3.
高級用戶:靜默/無人安裝
-
您可以使用下列命令來靜默安裝MuseScore:
msiexec /i MuseScore-X.Y.msi /qb-
卸載
您可以從開始功能表卸載MuseScore:選擇開始→Al所有程式→MuseScore 3→Uninstall MuseScore,亦可通過控制台卸之。請注意,這將不會刪除您的樂譜和MuseScore配置。
解決問題
在Windows XP和Vista上,安裝器可能會被系統遮罩。若您無法順利安裝MuseScore,請右擊已下載的安裝檔,並點擊“屬性”。倘若跳出資訊“這個檔來自另一台電腦,它可能會被阻止以保護本機。” 點擊"不阻止"、"OK" 並 再次按兩下安裝檔。
外部連結
在macOS上安裝
安裝
你將在MuseScore下載頁找到DMG(磁片映射)檔。點擊macOS下載連結即可開始下載。下載完成後,請按兩下DMG檔來裝載磁片映射。
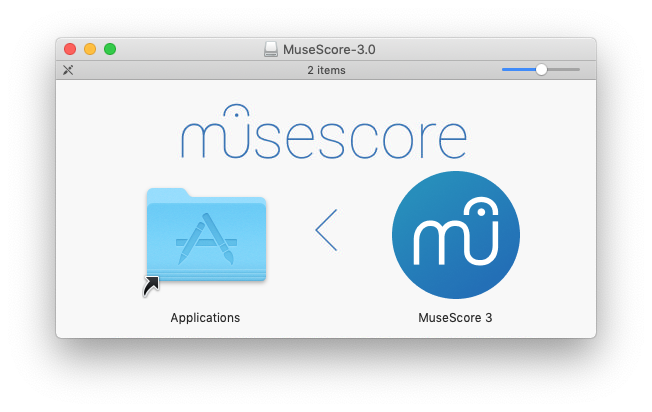
將MuseScore圖示拖拽到Applications資料夾圖示。
若您未以管理員身份登入,macOS會詢問密碼:點擊 認證並輸入密碼 以繼續。
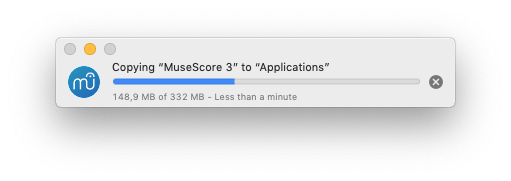
當應用程式複製完成後,請彈出磁片映射。此時您可以從應用資料夾、聚焦搜索或啟動台啟動MuseScore。
注意: 在macOS 10.15 Catalina中,系統會詢問您是否允許MuseSocre訪問使用者部分的檔。當您在Catalina中第一次使用本軟體時,系統會向您詢問,請點擊“好”按鈕。如果您意外跳過了這個步驟,您也可以在系統偏好設置 > 安全與隱私 > 檔與資料夾中進行許可。您需要點擊左下角小鎖圖示🔒,輸入您的登陸密碼,找到MuseScore並將其加入應用程式清單中,勾選“文稿”和“下載”資料夾。
卸載
只需將應用資料夾內的MuseScore刪除即可。
在Apple遠程桌面安裝
您可以利用ARD的複製功能將MuseScore部署到多個計算器。因為MuseScore是一個獨立應用,所以您能夠輕鬆把應用複製到目的電腦的 '/Application' 資料夾。只要不同版本的MuseScore的名稱不同,您也可以安裝。
外鏈
在Linux上安裝
從MuseScore 2.0.3起,您可以像Windows和Mac用戶一樣,直接從 下載 頁面獲取Linux版本。有了 AppImage 封裝格式,您可以在幾乎所有的Linux發行版本上進行安裝。如果您願意,仍可通過 套裝軟體管理器 的傳統方式進行安裝(但您可能需要等待相關維護者更新包內容)。當然,您始終可以從 原始程式碼進行編譯。
AppImage
AppImage格式 是一種新的Linux程式封裝方法。AppImages 是便攜的——它們無需安裝即可運行在大多數Linux發行版本上。所有的依賴包均包含於一個AppImage檔。
第一步 - 下載
在下載AppImage之前,你可能需要瞭解你處理器的架構。你可以使用以下命令來獲知:
arch或
uname -m
輸出結果會類似於 “i686”, “x86_64” 或者 “armv7”:
i686(或類似的) - 32位 Intel/AMD 處理器(常見於老舊電腦)。x86_64(或類似的) - 64位 Intel/AMD 處理器(現代筆記本、桌上型電腦以及大多數Chromebook)。armv7(或更高的版本) - ARM 處理器。(手機,平板電腦,運行Ubuntu Mate的第二、第三代樹莓派以及一些Chromebook。 大部分為32位)
現在你可以轉到下載 頁面找到符合您電腦架構的AppImage。下載的文件將以 “MuseScore-X.Y.Z-$(arch).AppImage”命名。
第二步 - 賦予安裝許可權
在您能夠使用AppImage開始安裝之前,您需要賦予其作為程式運行的許可權。
在終端中:
這個命令可以賦予用戶(u)執行AppImage的許可權。它在所有Linux系統上均可運行。
    cd ~/Downloads
    chmod u+x MuseScore*.AppImage
注釋:使用"cd"命令來改變你想保存AppImage的目錄。
使用檔案管理員:
如果你不想使用命令列,通常從檔案管理員內能賦予運行的許可權。
使用GNOME(Nautilus),僅需:
- 在AppImage上右鍵後選擇“屬性”。
- 打開“許可權”選項卡。
- 打開名為“允許可執行檔作為程式”的選項。
在其他檔管理系統中的操作可能會有出入。
第三步 - 運行它!
現在你應該可以通過按兩下運行程式了!
在你下載AppImage檔的時候它可能被保存在下載檔案夾內,但你可以在任何時候把它移動到其它地方(比如放到桌面以便於訪問)。如果你想卸載的話僅需刪除即可。
安裝AppImage (可選)
你可以直接運行AppImage而不安裝,但如果你需要使程式完全與系統整合,則需要你進行安裝。如果你安裝,便有以下好處:
- 將AppImage添加進應用程式功能表或者啟動器
- 為MuseScore的檔(MSCZ、MSCX)和MusicXML 檔(MXL、XML)選擇正確的圖示
- 使AppImage添加進你檔案管理員的右鍵“使用……打開”功能表
若要安裝,在終端內加入install選擇來運行AppImage((就在下方)。這將向你的電腦拷貝一份桌面檔和一些列圖示。如果你需要卸載,則需在你刪除AppImage之前,使用remove選項來卸載。是否安裝不影響創建的樂譜。
使用命令列運行來使用參數
在終端內運行AppImage可以讓你在運行時添加各類選項,MuseScore的AppImage有一些參數(英文)可供使用。
你需要更改到AppImage存儲的目錄下,如:
    cd ~/Desktop
    ./MuseScore*.AppImage [option...]
或提供AppImage的路徑:
~/desktop/MuseScore*.AppImage [option...]
使用“--help”和“man”命令才查看所有可用的選項:
    ./MuseScore*.AppImage --help   # displays a complete list of command line options
    ./MuseScore*.AppImage man      # displays the manual page (explains what the options do)
發行包
Fedora
-
導入GPG金鑰:
su
rpm --import http://prereleases.musescore.org/linux/Fedora/RPM-GPG-KEY-Seve
-
到MuseScore的下載頁面。點擊符合你電腦架構的穩定版Fedora連結。
-
根據你的架構不同,你有兩種方式來安裝MuseScore
-
對於 i386架構
    su
yum localinstall musescore-X.Y-1.fc10.i386.rpm
- 對於x86_64架構
    su
yum localinstall musescore-X.Y-1.fc10.x86_64.rpm
如果安裝後沒有聲音,可以查看 Fedora 11的聲音問題.
你也可在下載頁面查看所有可用的發行版本
額外參考
Install on Chromebook
Desktop program
MuseScore runs on Chrome OS within a Linux container (also known as Crostini). There is a special procedure you can use to install MuseScore on a Chromebook if you are not already comfortable with running Linux apps. See the article Install MuseScore on Chromebook for more information. You can also get a special build of MuseScore 3 for ARM processors via that link (the official builds are only for Intel).
Alternatively, if you prefer to use the plain Linux commands, follow the steps described in the video linked below:
- Install Linux Virtual Machine called Crostini. Go to Settings > Linux > Turn On
- Download Musescore AppImage package
- Configure AppImage to run. Set
chmod +xfor the AppImage file - Run AppImage with
./followed by the Musescore package file name -
Install required libraries if necessary, e.g.:
sudo apt-get install libvorbisfile3sudo apt-get install libnss3
-
Install AppImage (using the
installcommand line option) to avoid running it from Linux command line each time - Enjoy!
External links
- Watch this interactive video for more details
- Special article on how to Install MuseScore on Chromebook
- How to run MuseScore on ChromeOS (MuseScore HowTo)
語言、翻譯和擴展
MuseScore適用您系統所用的自然語言(日常生活中所使用的,與地區、文化相關聯)。
更改語言
1.從頂部功能表列,選擇編輯→偏好設置... (Mac: MuseScore→偏好設置...);
2. 在通用標籤頁內,從語言欄的下拉清單選擇要使用的語言:
資源與翻譯中心
資源與翻譯中心內可以安裝與卸載擴展, 也可以用來更新介面翻譯。要訪問該介面,請按照以下步驟之一:
*從頂部功能表列,選擇幫助→資源與翻譯中心。
*從頂部功能表列選擇,選擇編輯→偏好設置...(Mac:MuseScore→偏好設置...),打開通用標籤頁,並按一下更新翻譯按鈕。
安裝/卸載擴展
要安裝/卸載擴展,請:
- 選擇資源與翻譯中心內的擴展標籤頁。
- 找到擴展。
- 按一下安裝或者 卸載 按鈕。
更新翻譯
要更新翻譯,請:
- 選擇資源與翻譯中心內的語言標籤頁。
- 按一下有可用更新按鈕 來升級語言翻譯檔。
注意:功能表和對話方塊中的文字會立即更改,但檢視器必須重啟後方能顯示更新的語言。
參閱
外鏈
檢查更新
注意: 這些選項僅在Mac和Windows版本上的MuseScore可用(不包括從Windows商店下載的版本),因為只有那些平臺能通過MuseScore.org直接升級。Linux發行版本(及Windows商店版本)有不同的升級機制。
對於那些能夠直接升級的版本,有兩個方法:
檢查自動升級
- 從功能表選擇編輯→偏好設置... (Mac: MuseScore→偏好設置...);
- 選擇升級 標籤頁。
- 請確保您已經勾選了"檢查MuseScore的更新"。(預設情況下是勾選的):
如果您啟用了這個選項,MuseScore會在每次啟動前檢查更新。在Mac和Windows版本中(不包括Windows商店版本),該選項允許自動升級器自動在後臺下載並安裝。
檢查升級
- 從功能表中選擇Help→檢查升級:
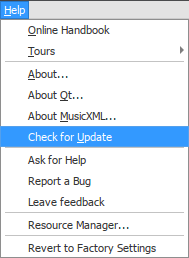
- 一個對話方塊會跳出來顯示當前版本升級狀態:“無可用升級”或是“有一個MuseScore更新可用”,點擊升級可以自動下載(小版本)或者跳轉到下載頁面(版本號首位變更的情況下,例如2.x→3.x)